1. Introduction
The MyPersonas Jive Add-On brings AI-powered digital MyPersonas directly into your Jive environment. It enhances collaboration by integrating knowledge from MyPersonas into Jive Spotlight and Advanced Search, while also providing administrators with tools to manage MyPersonas securely.
This guide covers:
-
Installation Guide (setup & configuration)
-
Admin Guide (managing MyPersonas inside Jive)
-
Troubleshooting Guide (common issues & fixes)
2. Prerequisites
Before installing, ensure you have:
-
License Key and Organization ID (provided by MyPersonas Support Team).
-
Add-On ZIP package (provided by MyPersonas Support).
-
Administrative access to your Jive instance (Hosted or Cloud).
3. Features
-
AI-Powered Search
-
Integrates MyPersonas knowledge into Jive Spotlight Search and Advanced Search.
-
-
Admin Management
-
Role-based management via a Jive security group (
MyPersonas Admins).
-
-
Seamless Integration
-
Works with both Jive Hosted and Jive Cloud environments.
-
-
Search Script Embedding
-
Allows custom integration of AI search into navigation templates or custom headers.
-
4. Installation Guide
Step 1: Prepare the Add-On
-
Unzip the Add-On ZIP file.
-
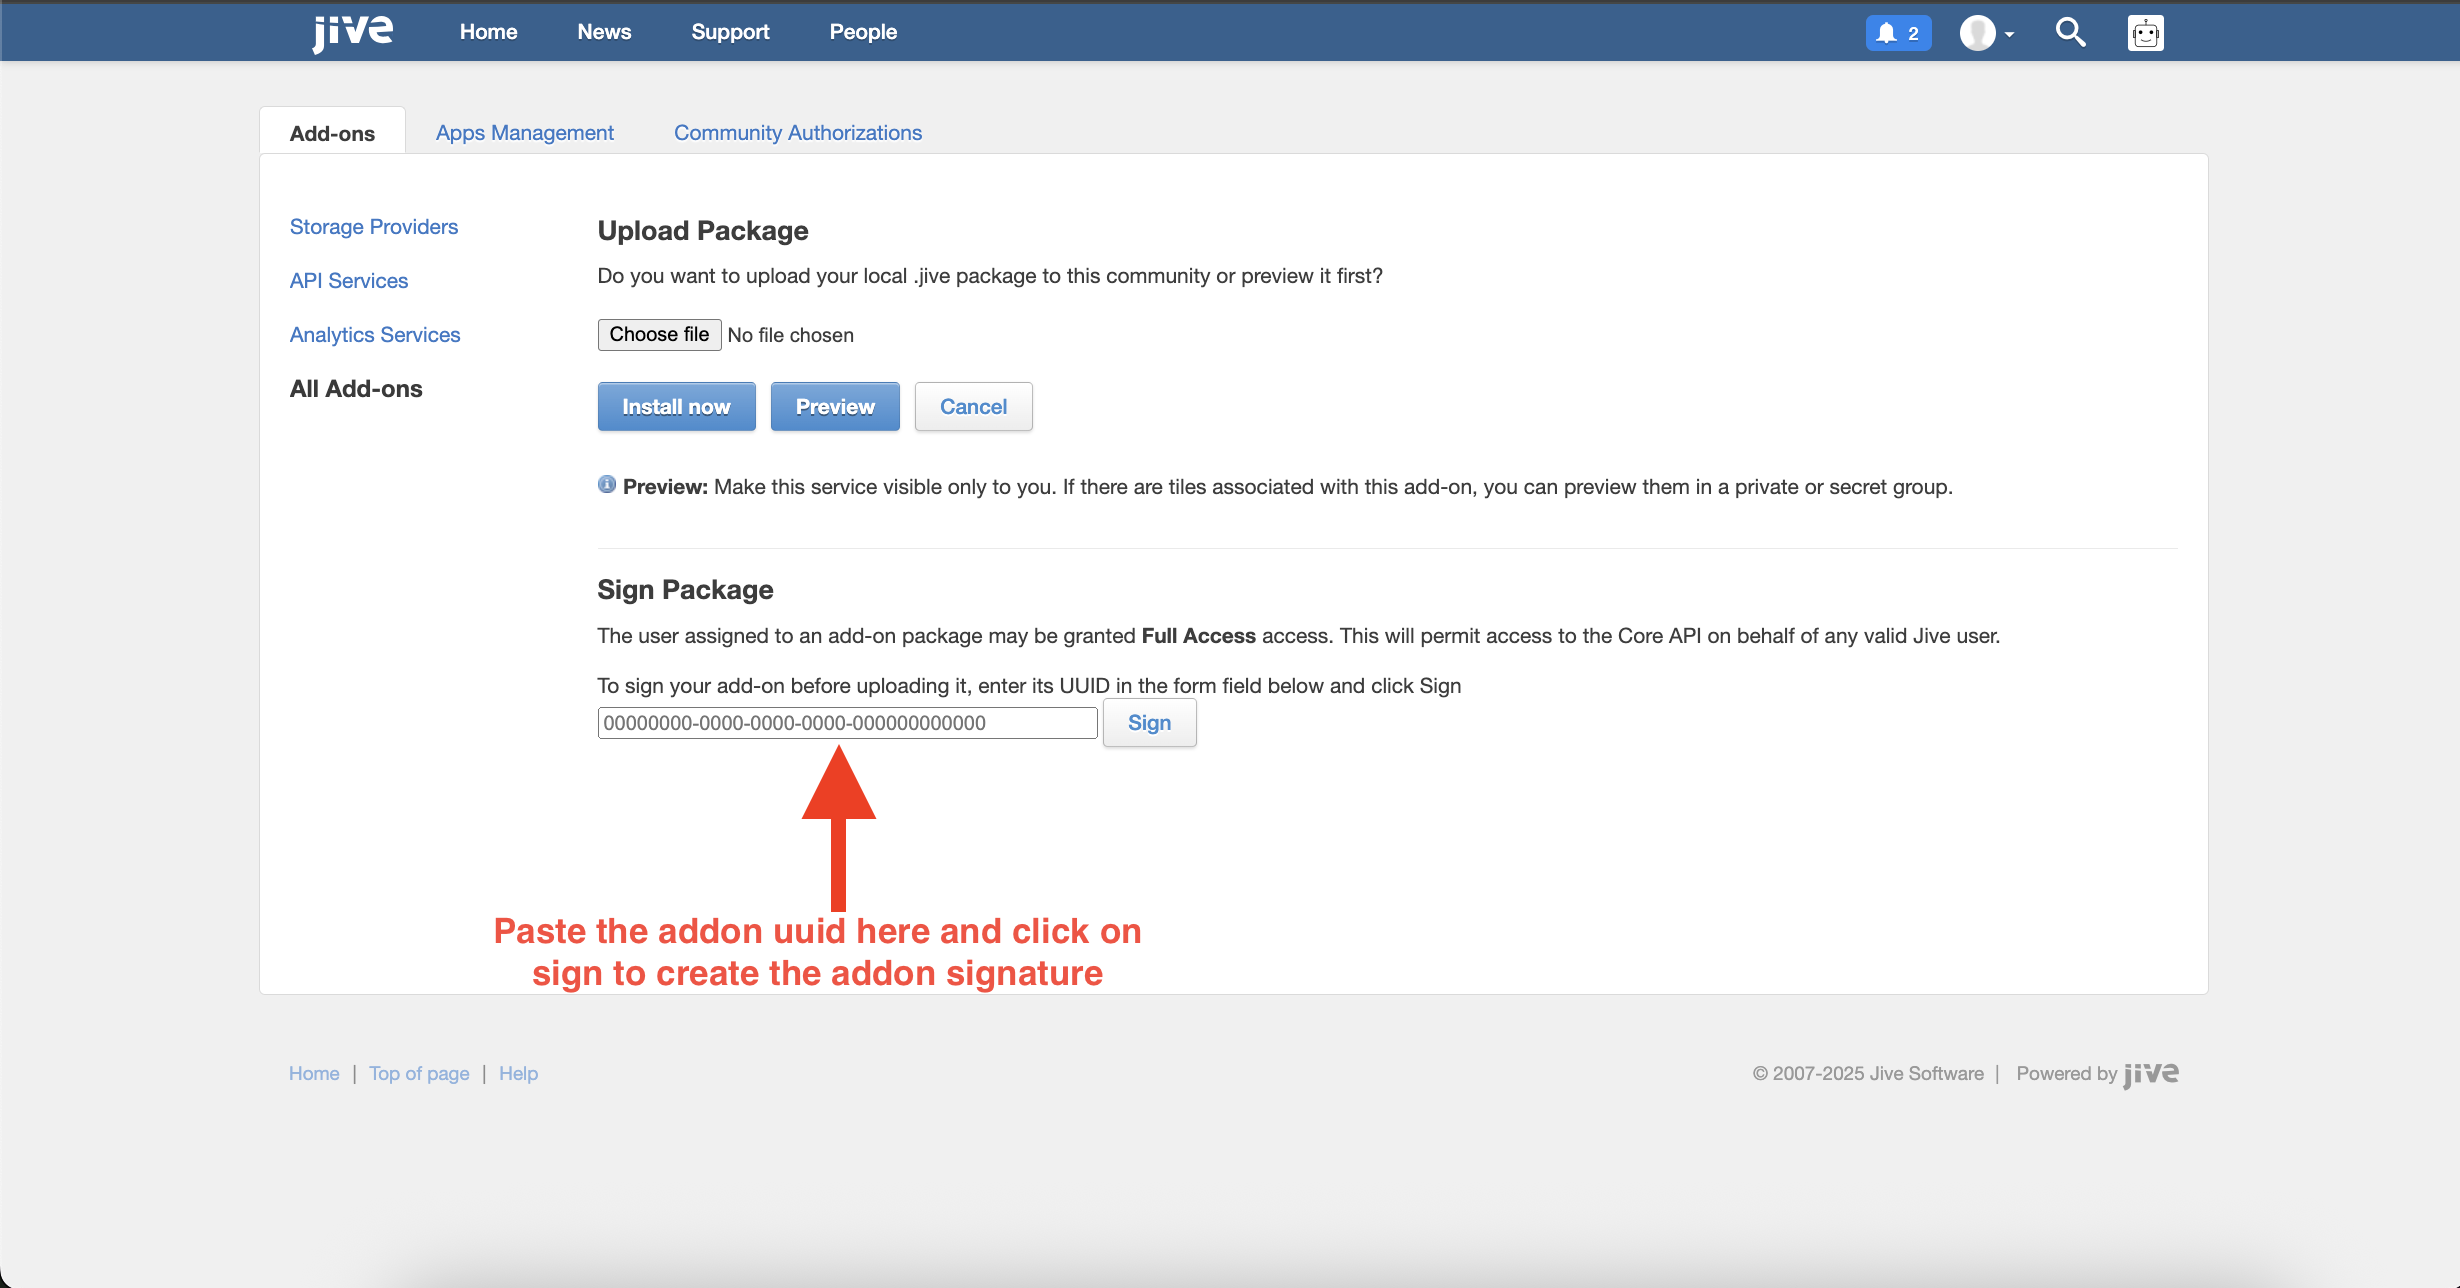
Open the
meta.jsonfile and copy the ID value. -
Go to Avatar → Add-Ons in Jive.
-
Press Ctrl/Cmd + Click on Upload Package and paste the ID.
-
Submit to generate the Jive Signature.
-
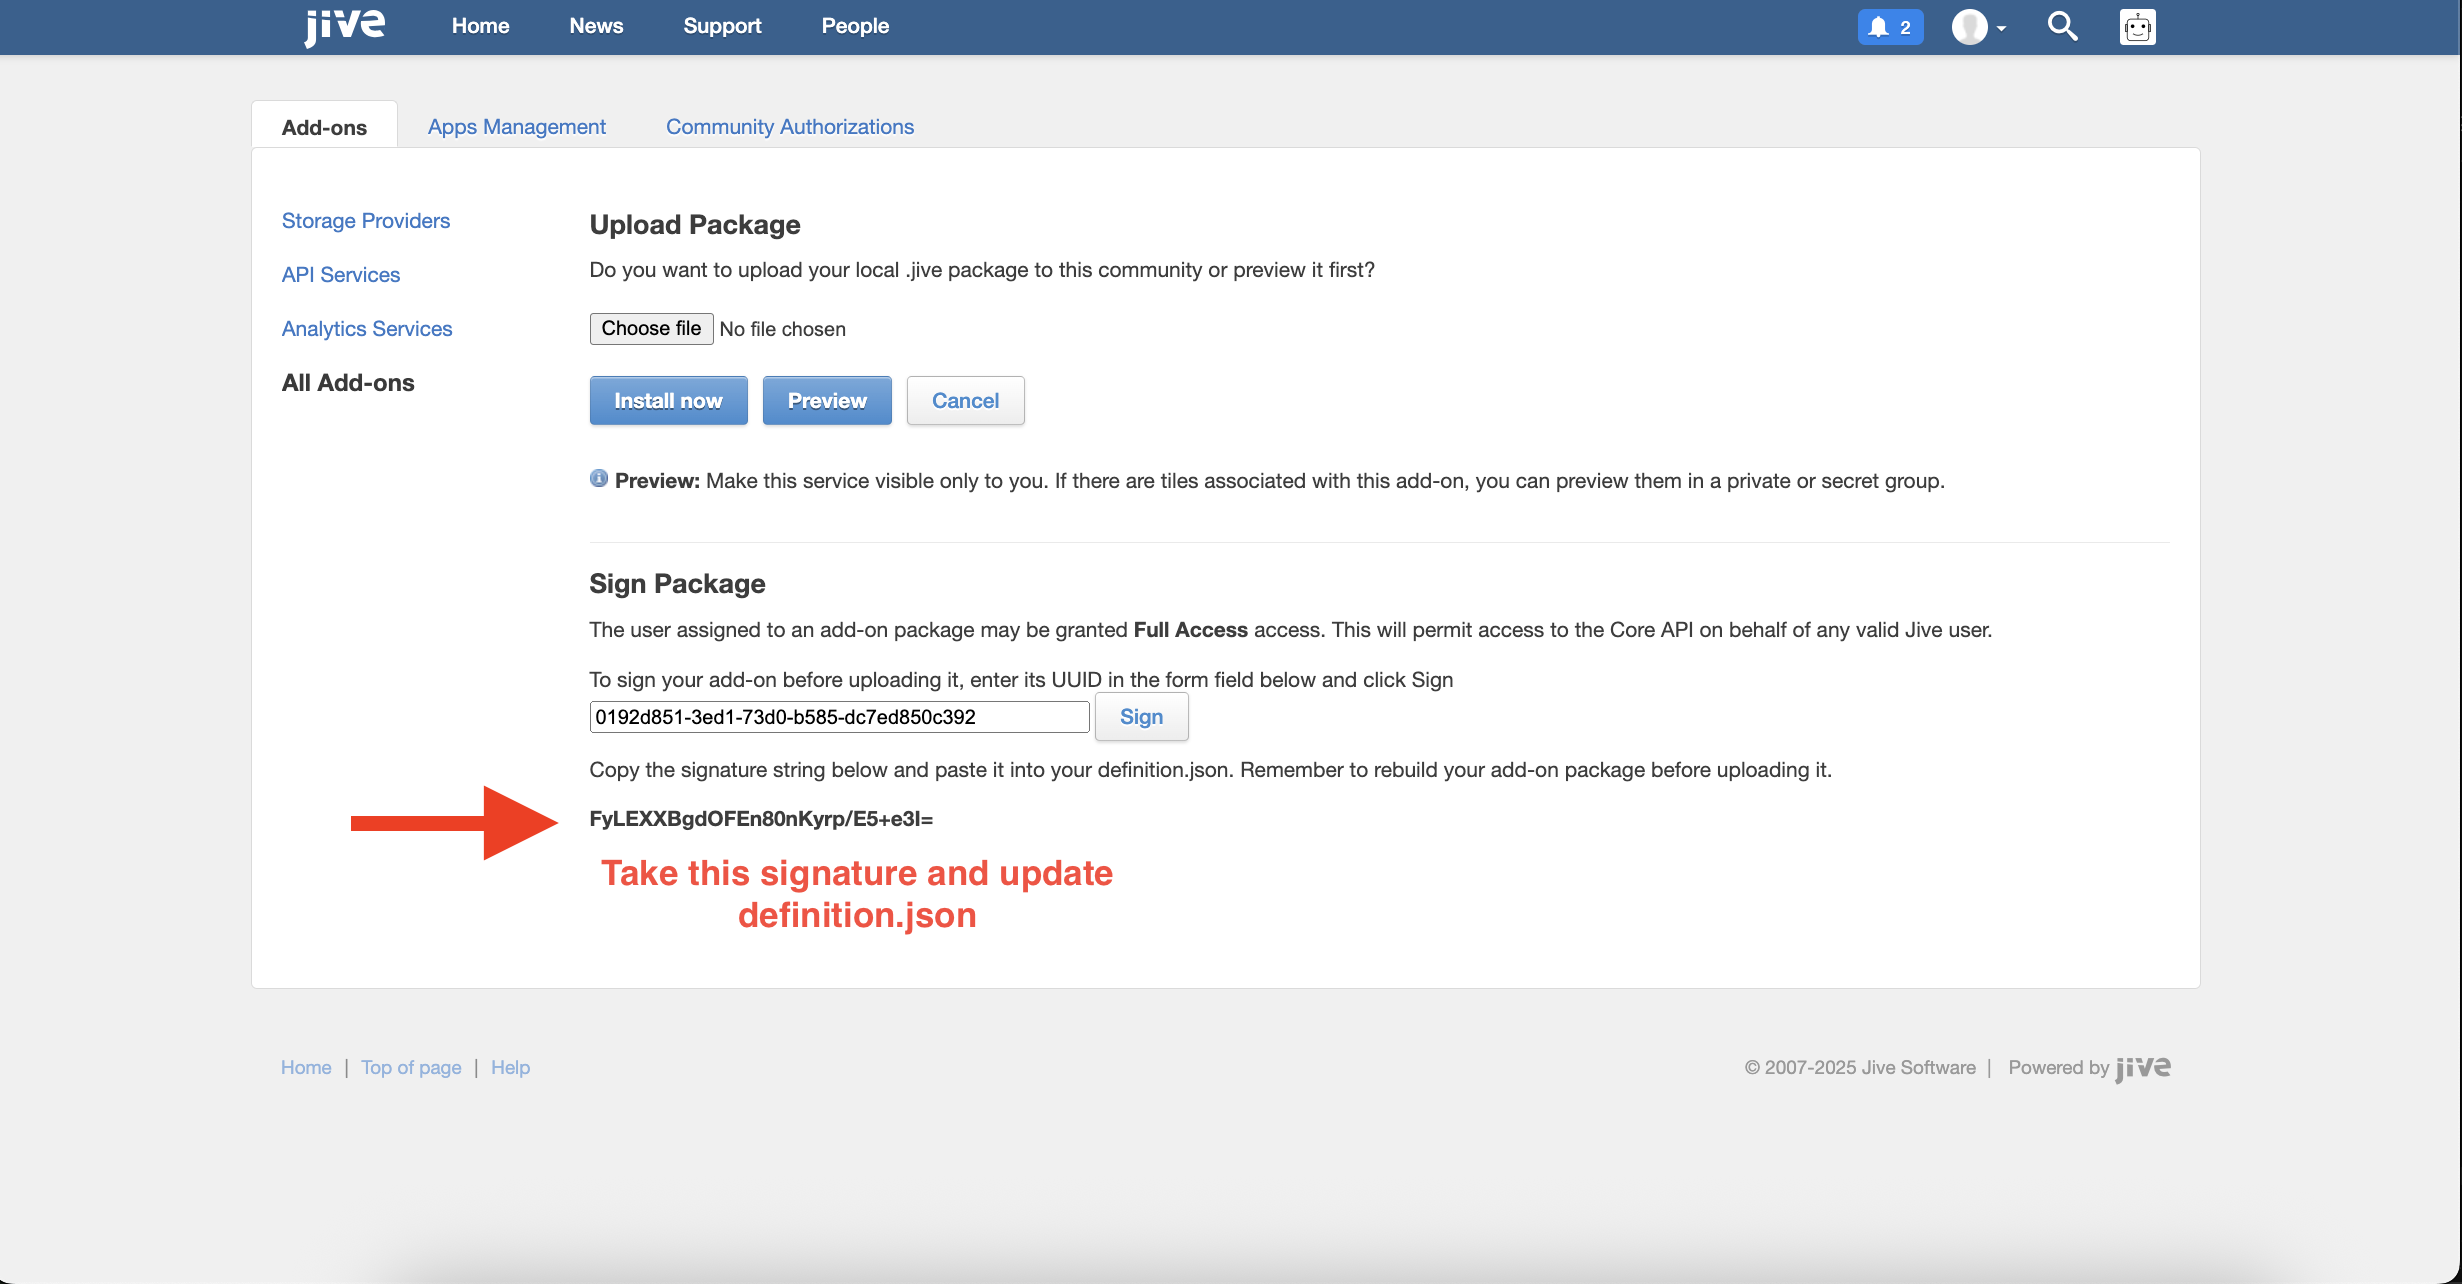
Copy the generated signature.
-
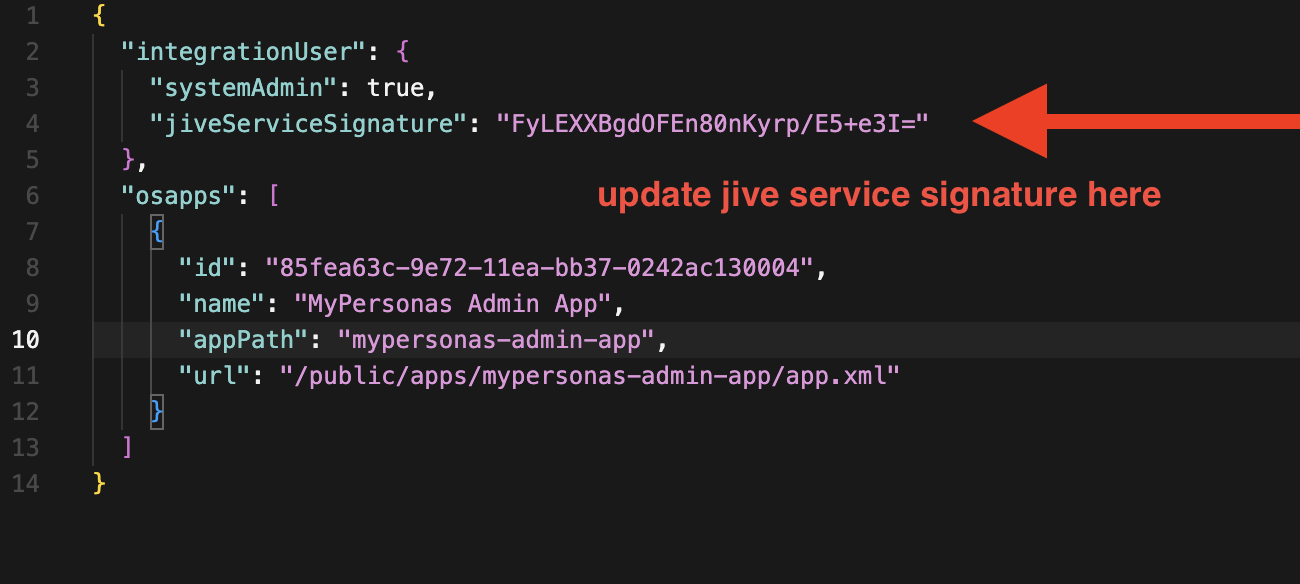
Open the
definition.jsonfile and paste the signature value underjiveSignature.
-
Save the file, then re-zip the add-on folder.
-
The add-on is now ready for upload.
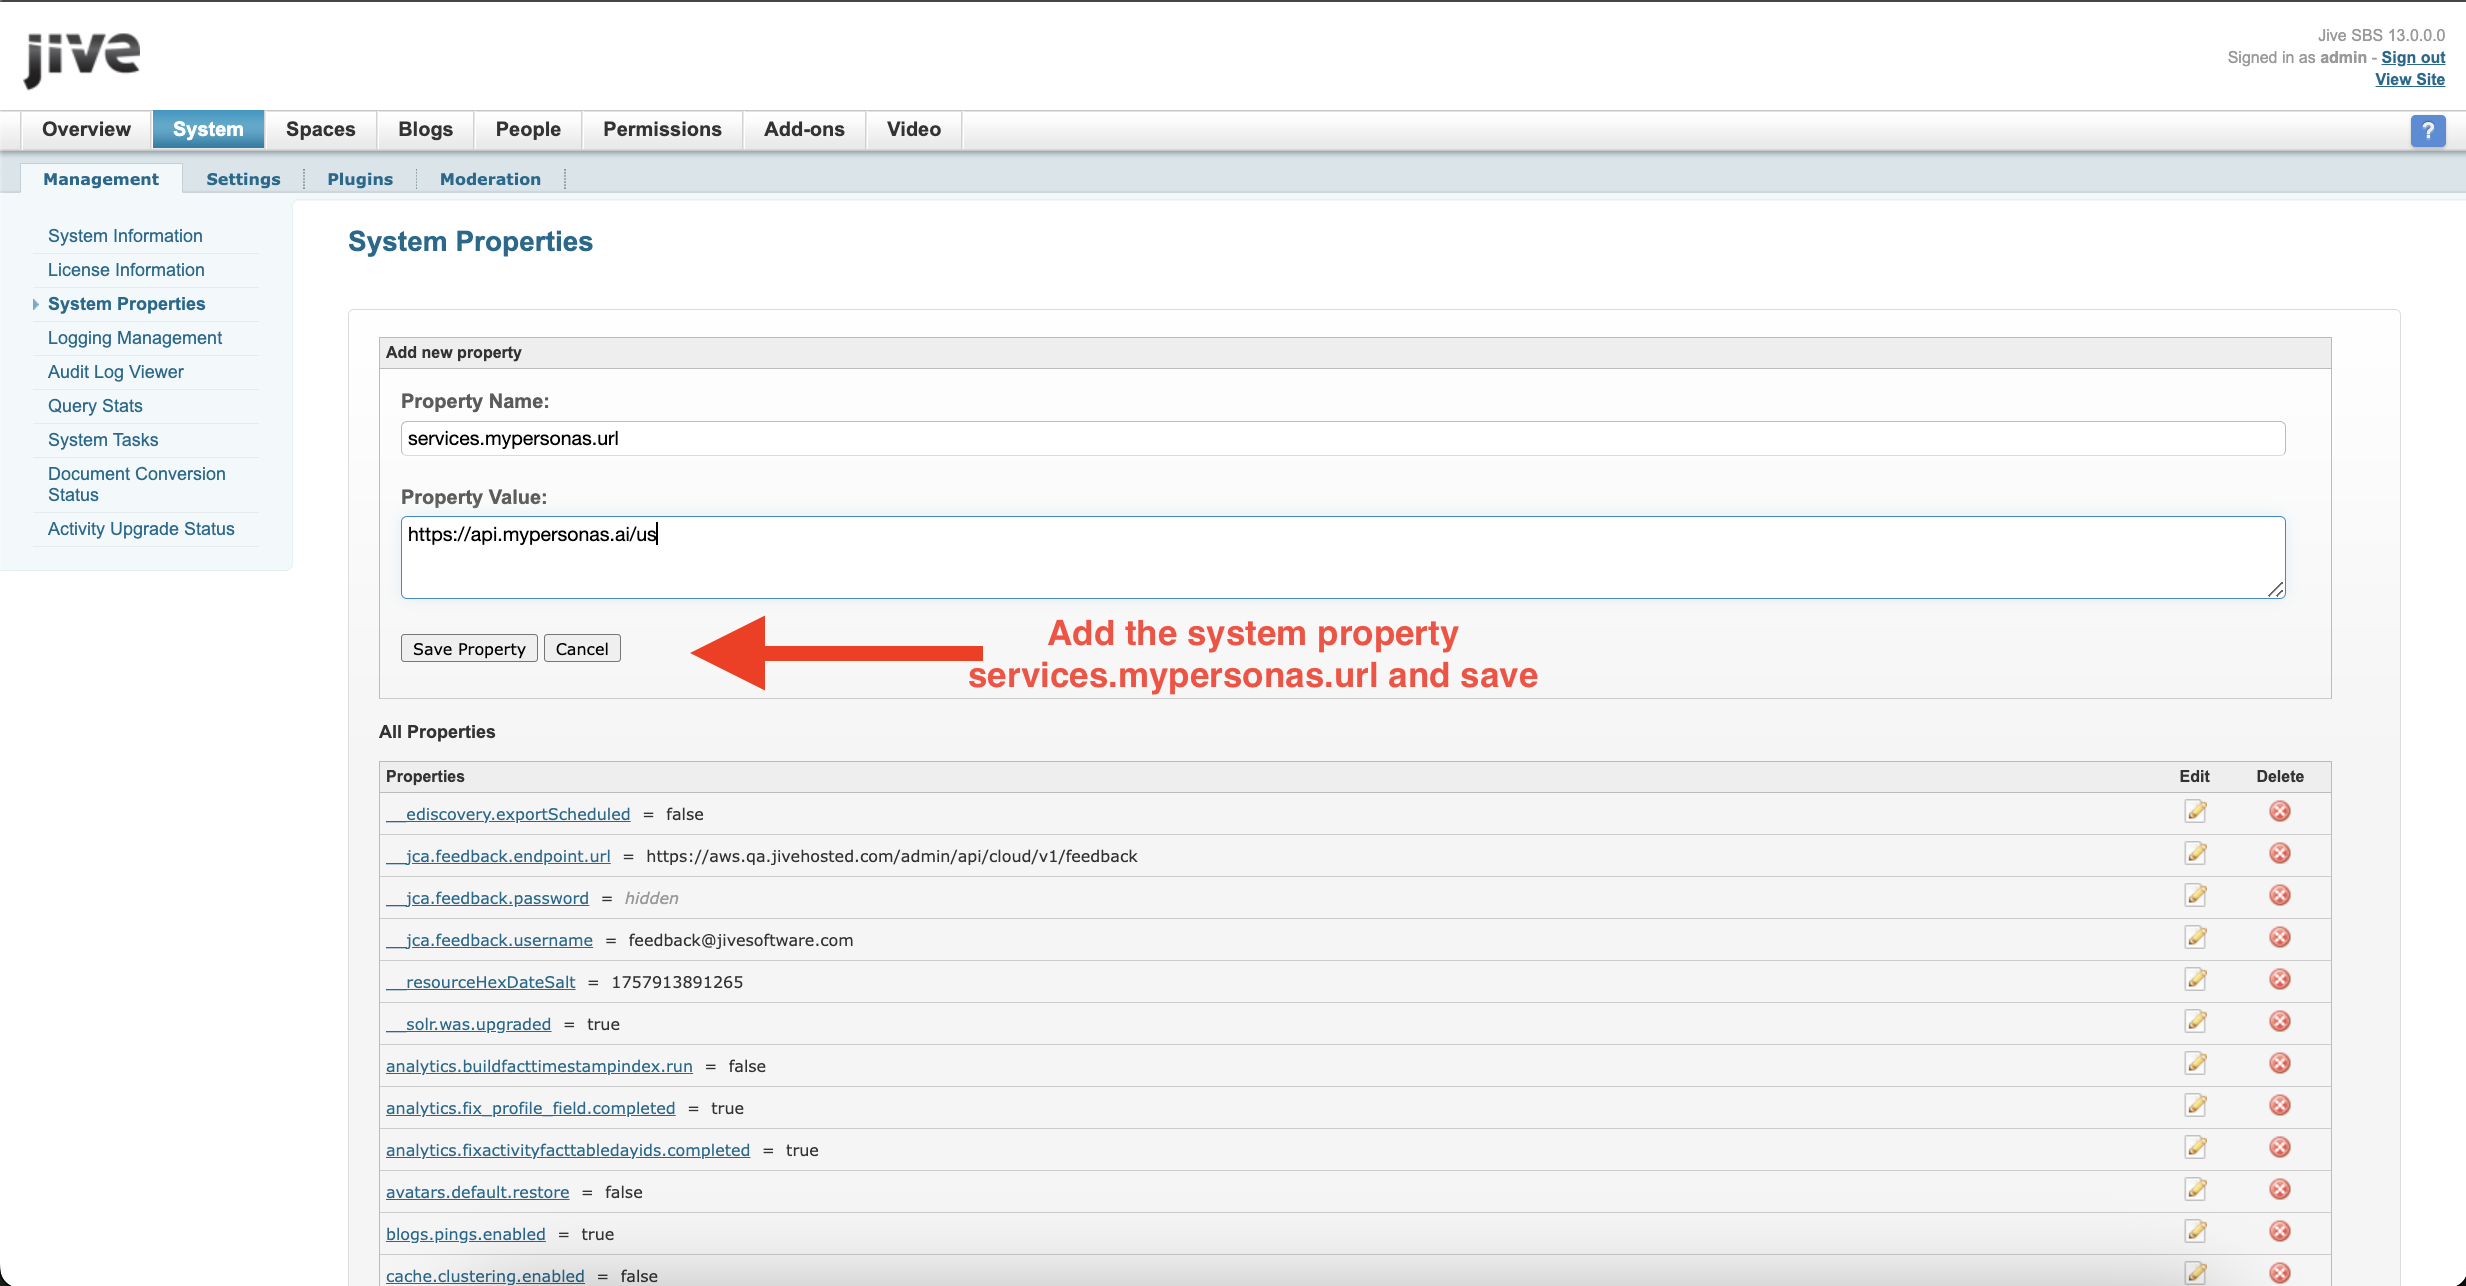
Step 2: Configure System Property
In Jive Admin Console → System Properties, set:
services.mypersonas.url = https://api.mypersonas.ai/us
Step 3: Upload Add-On
-
Upload the updated ZIP package (with updated
definition.json). -
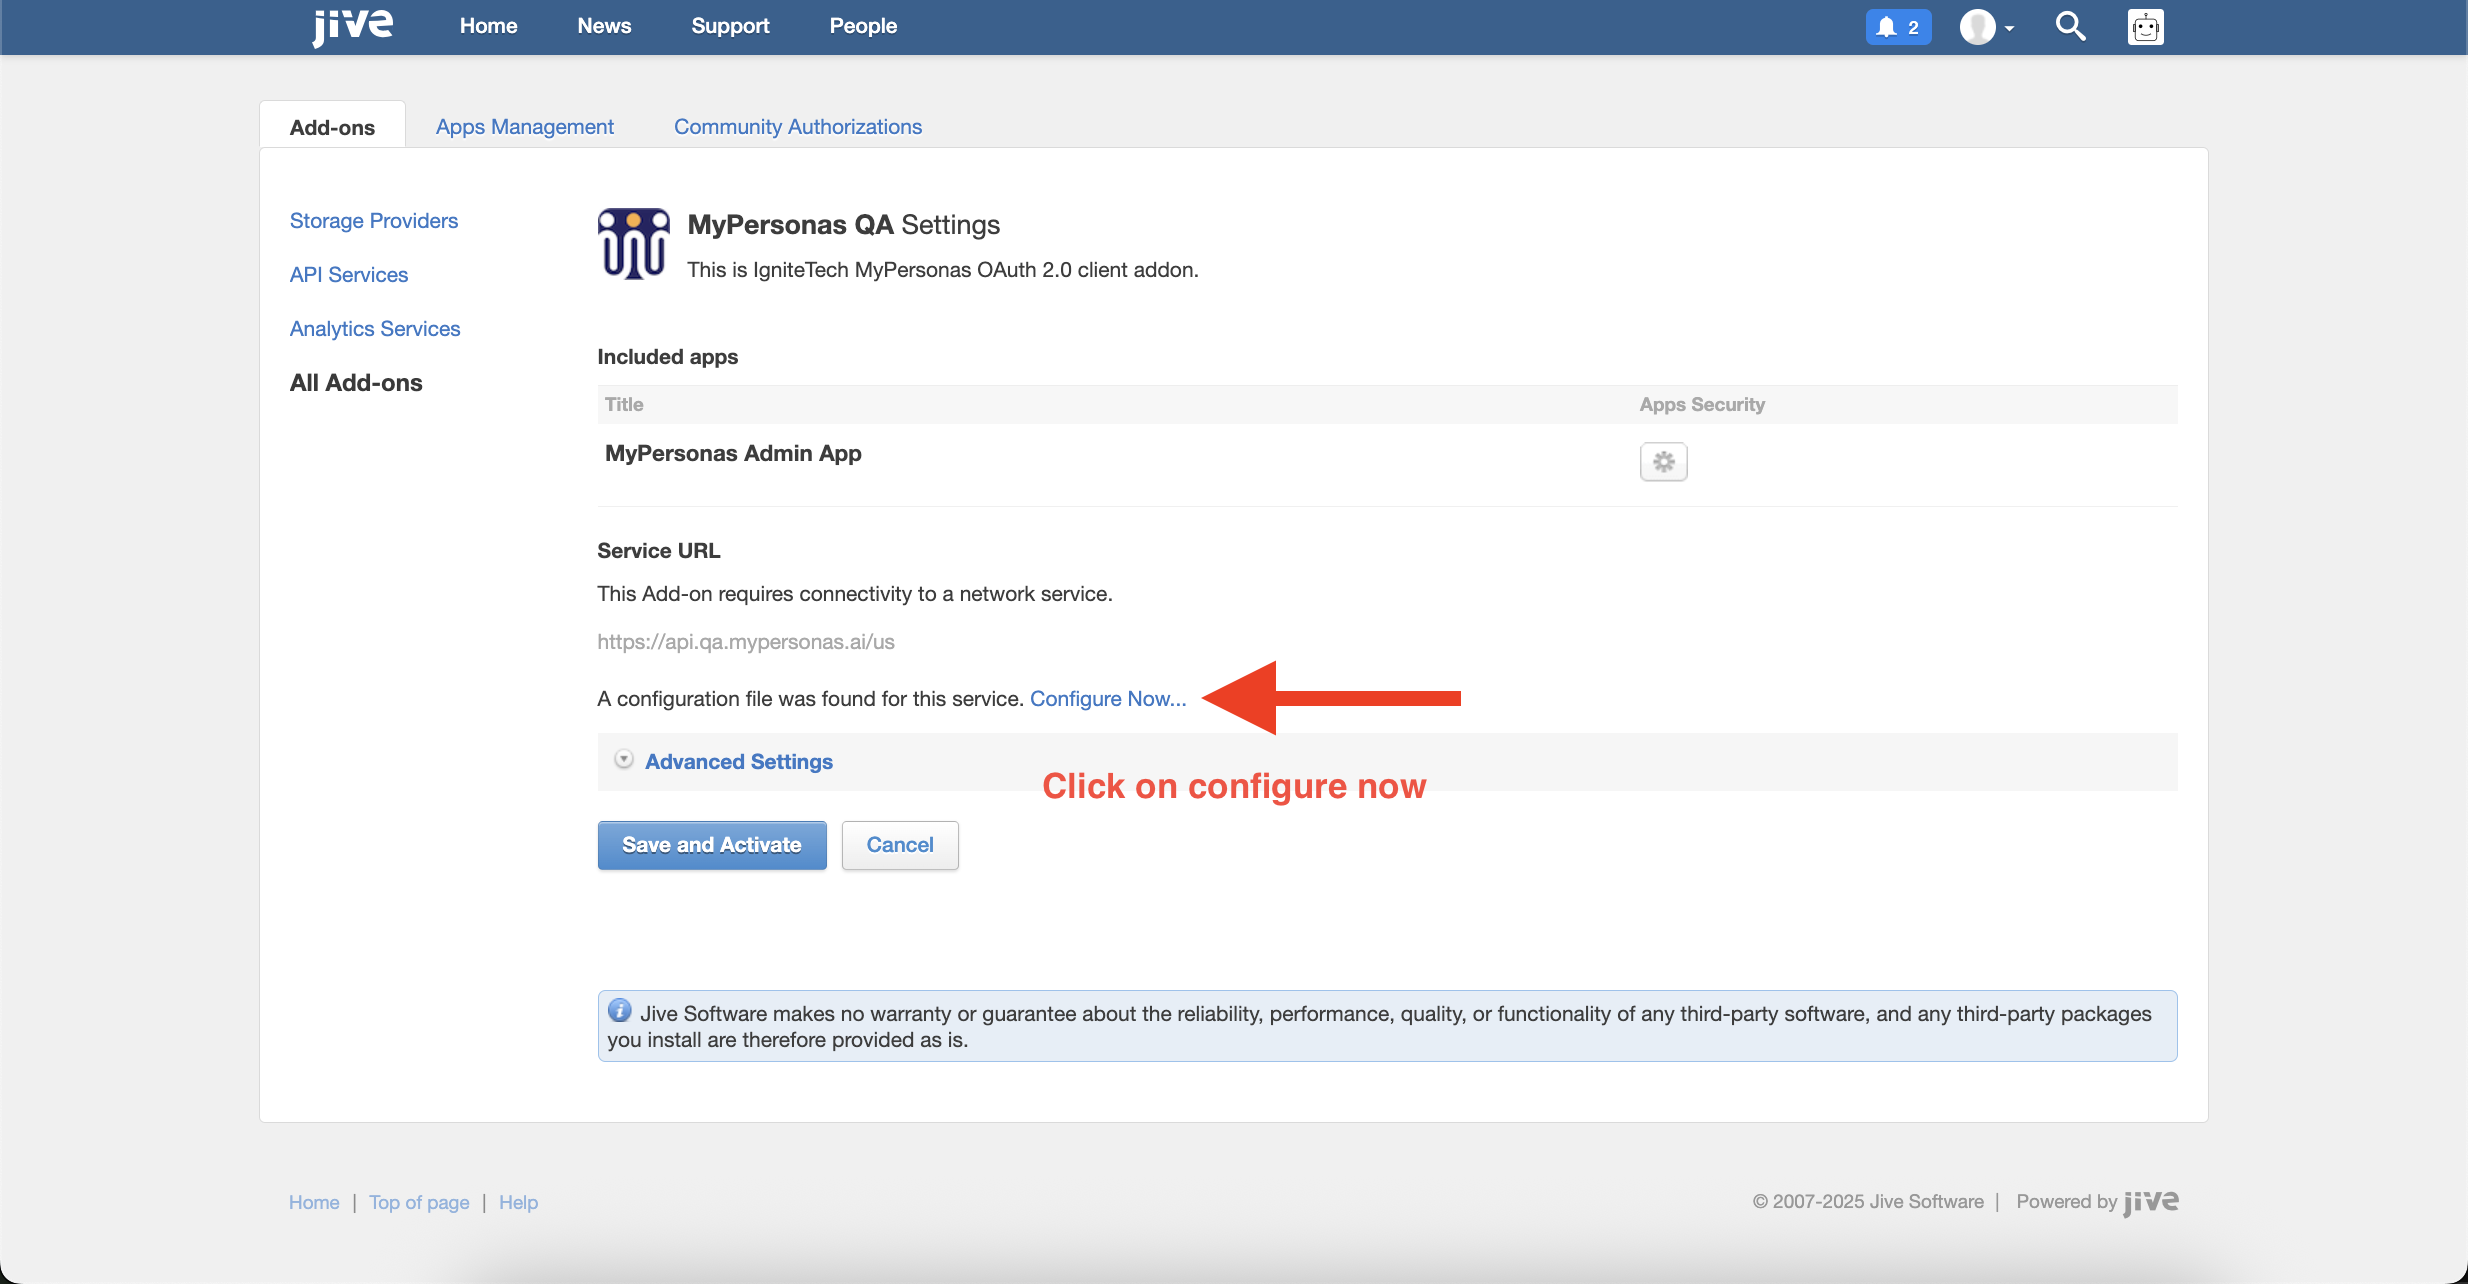
Once uploaded, click Configure Now… to proceed.
Step 4: Configure the Add-On
-
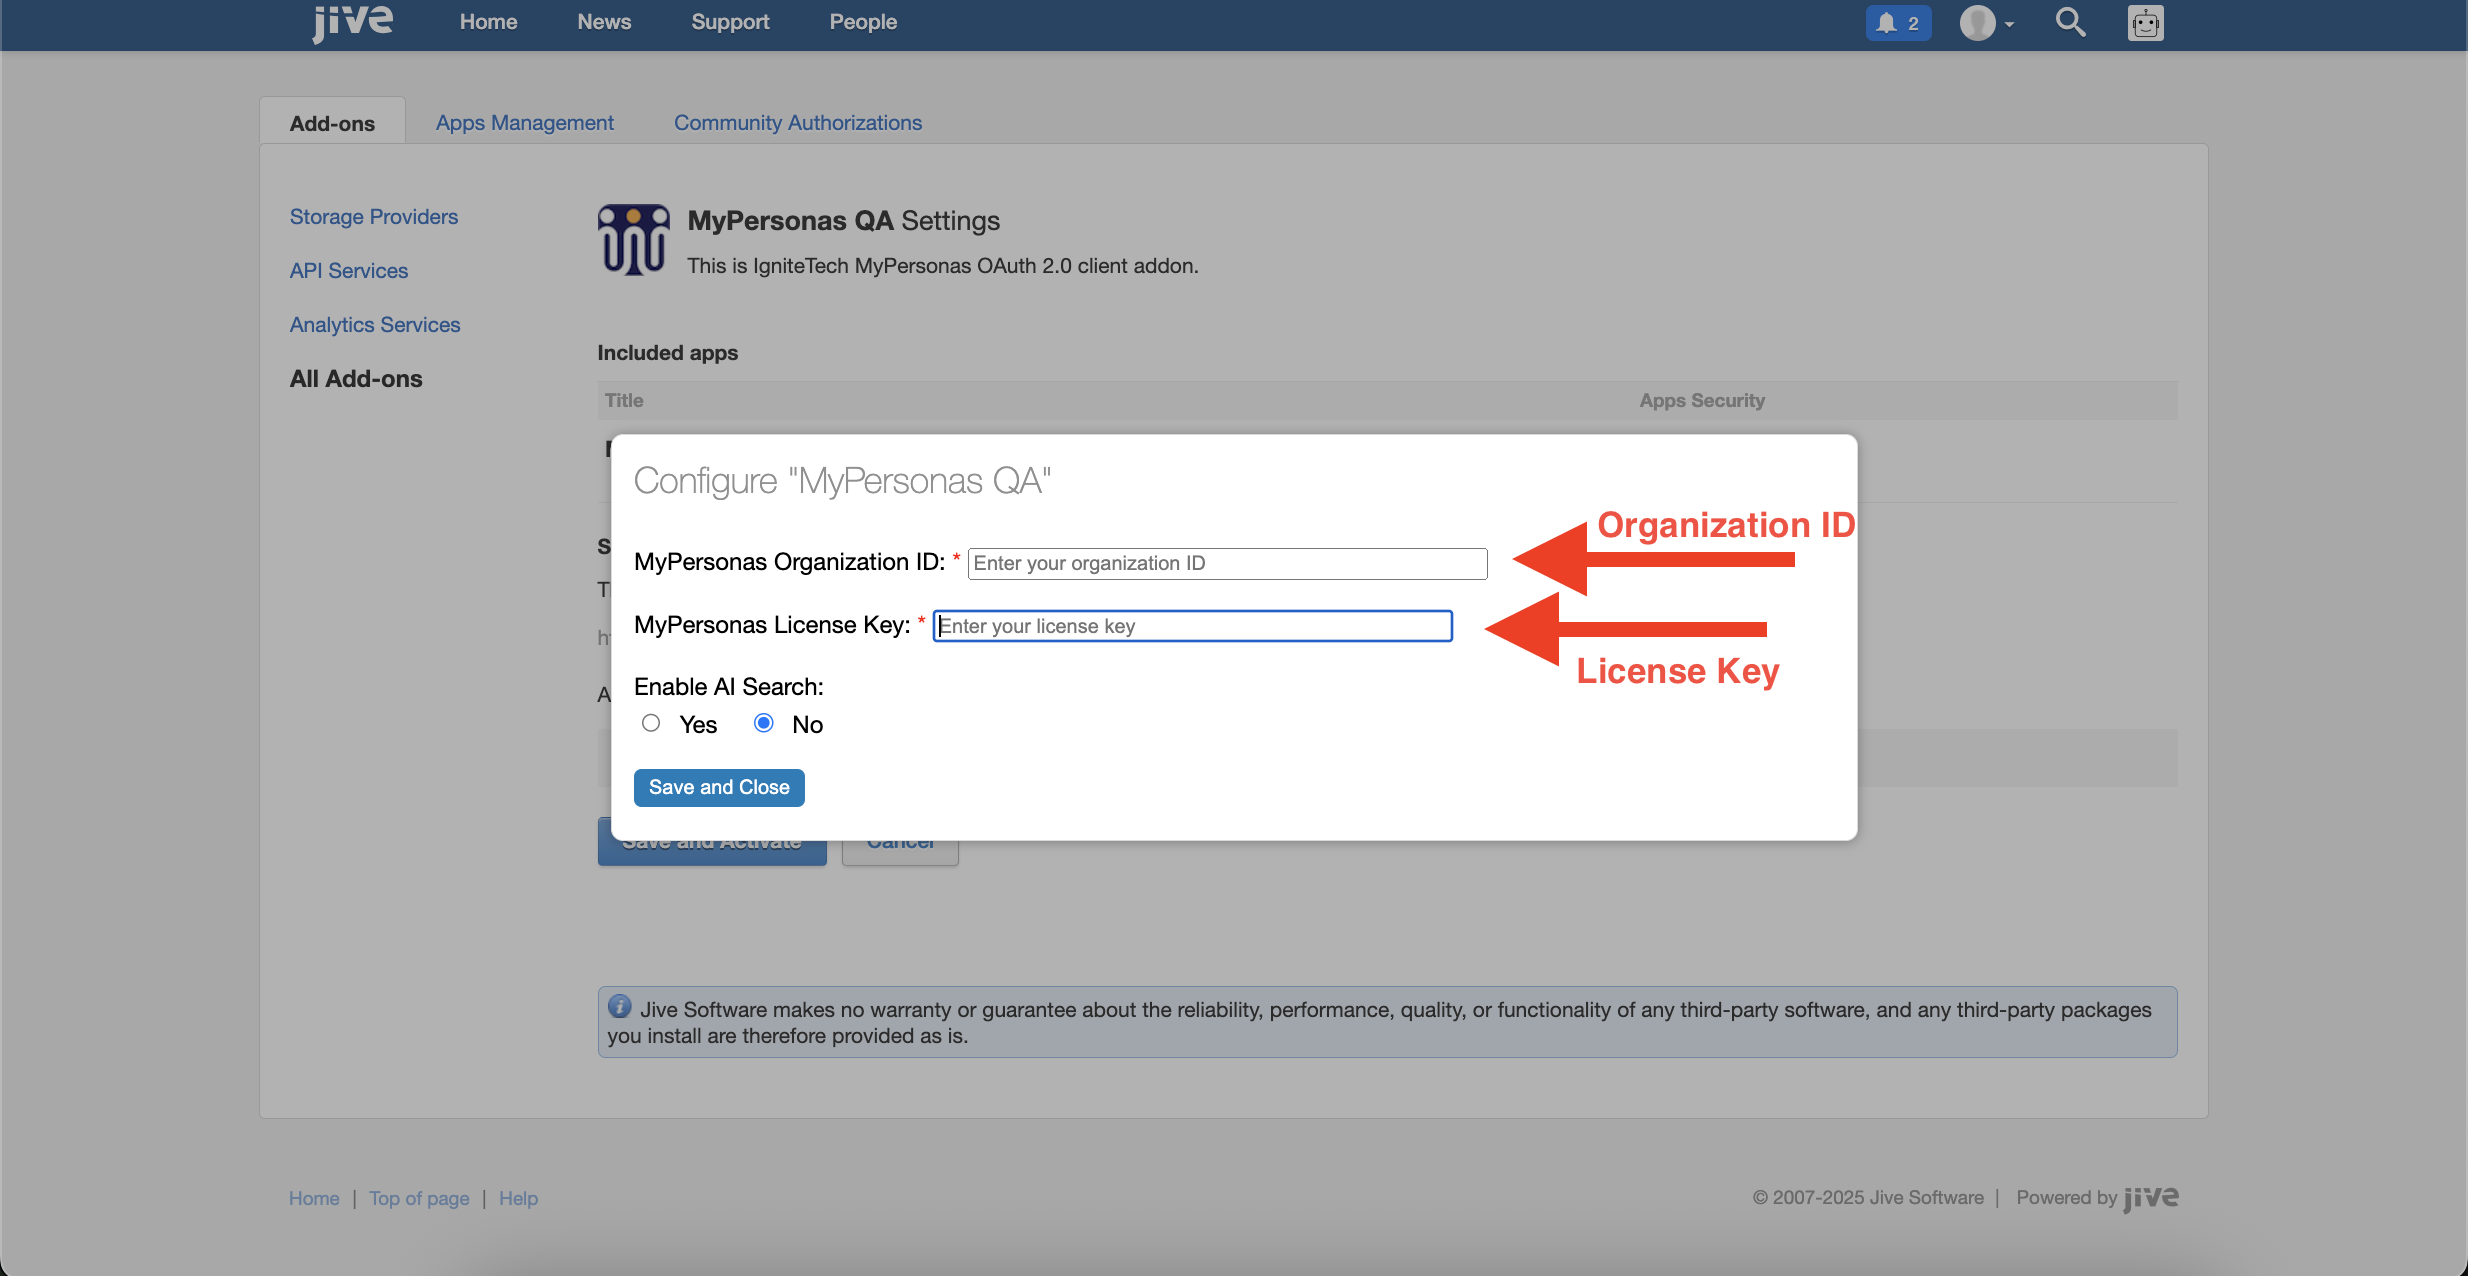
Enter Organization ID and License Key.
-
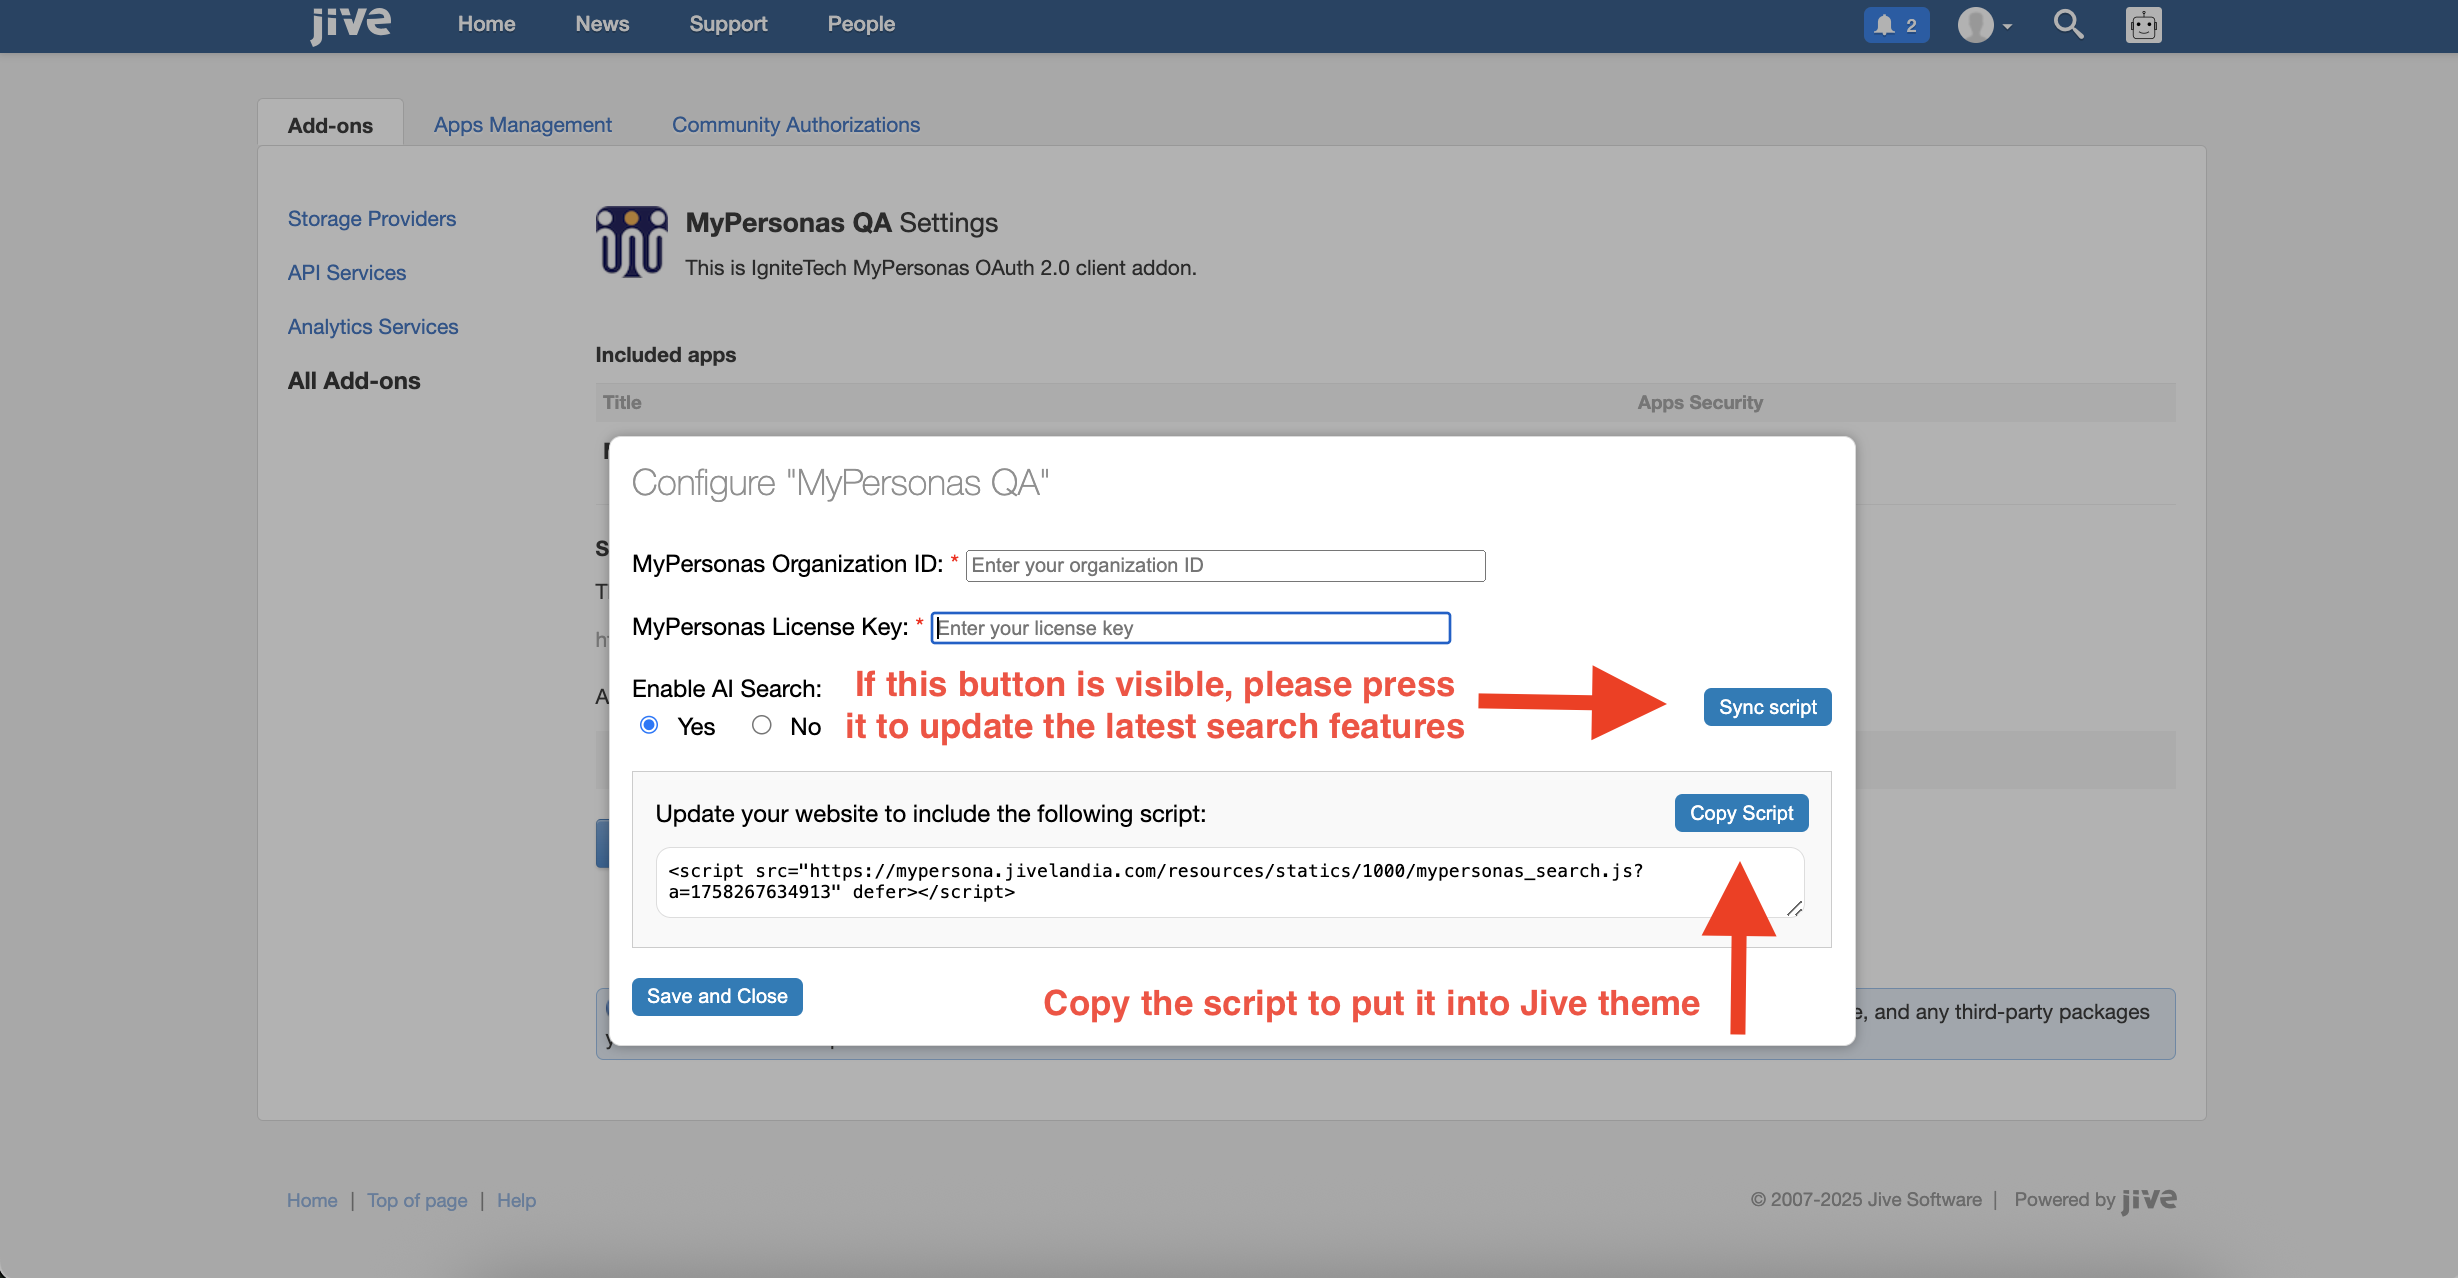
Enable search by selecting Yes.
-
If available, click Sync Script.
-
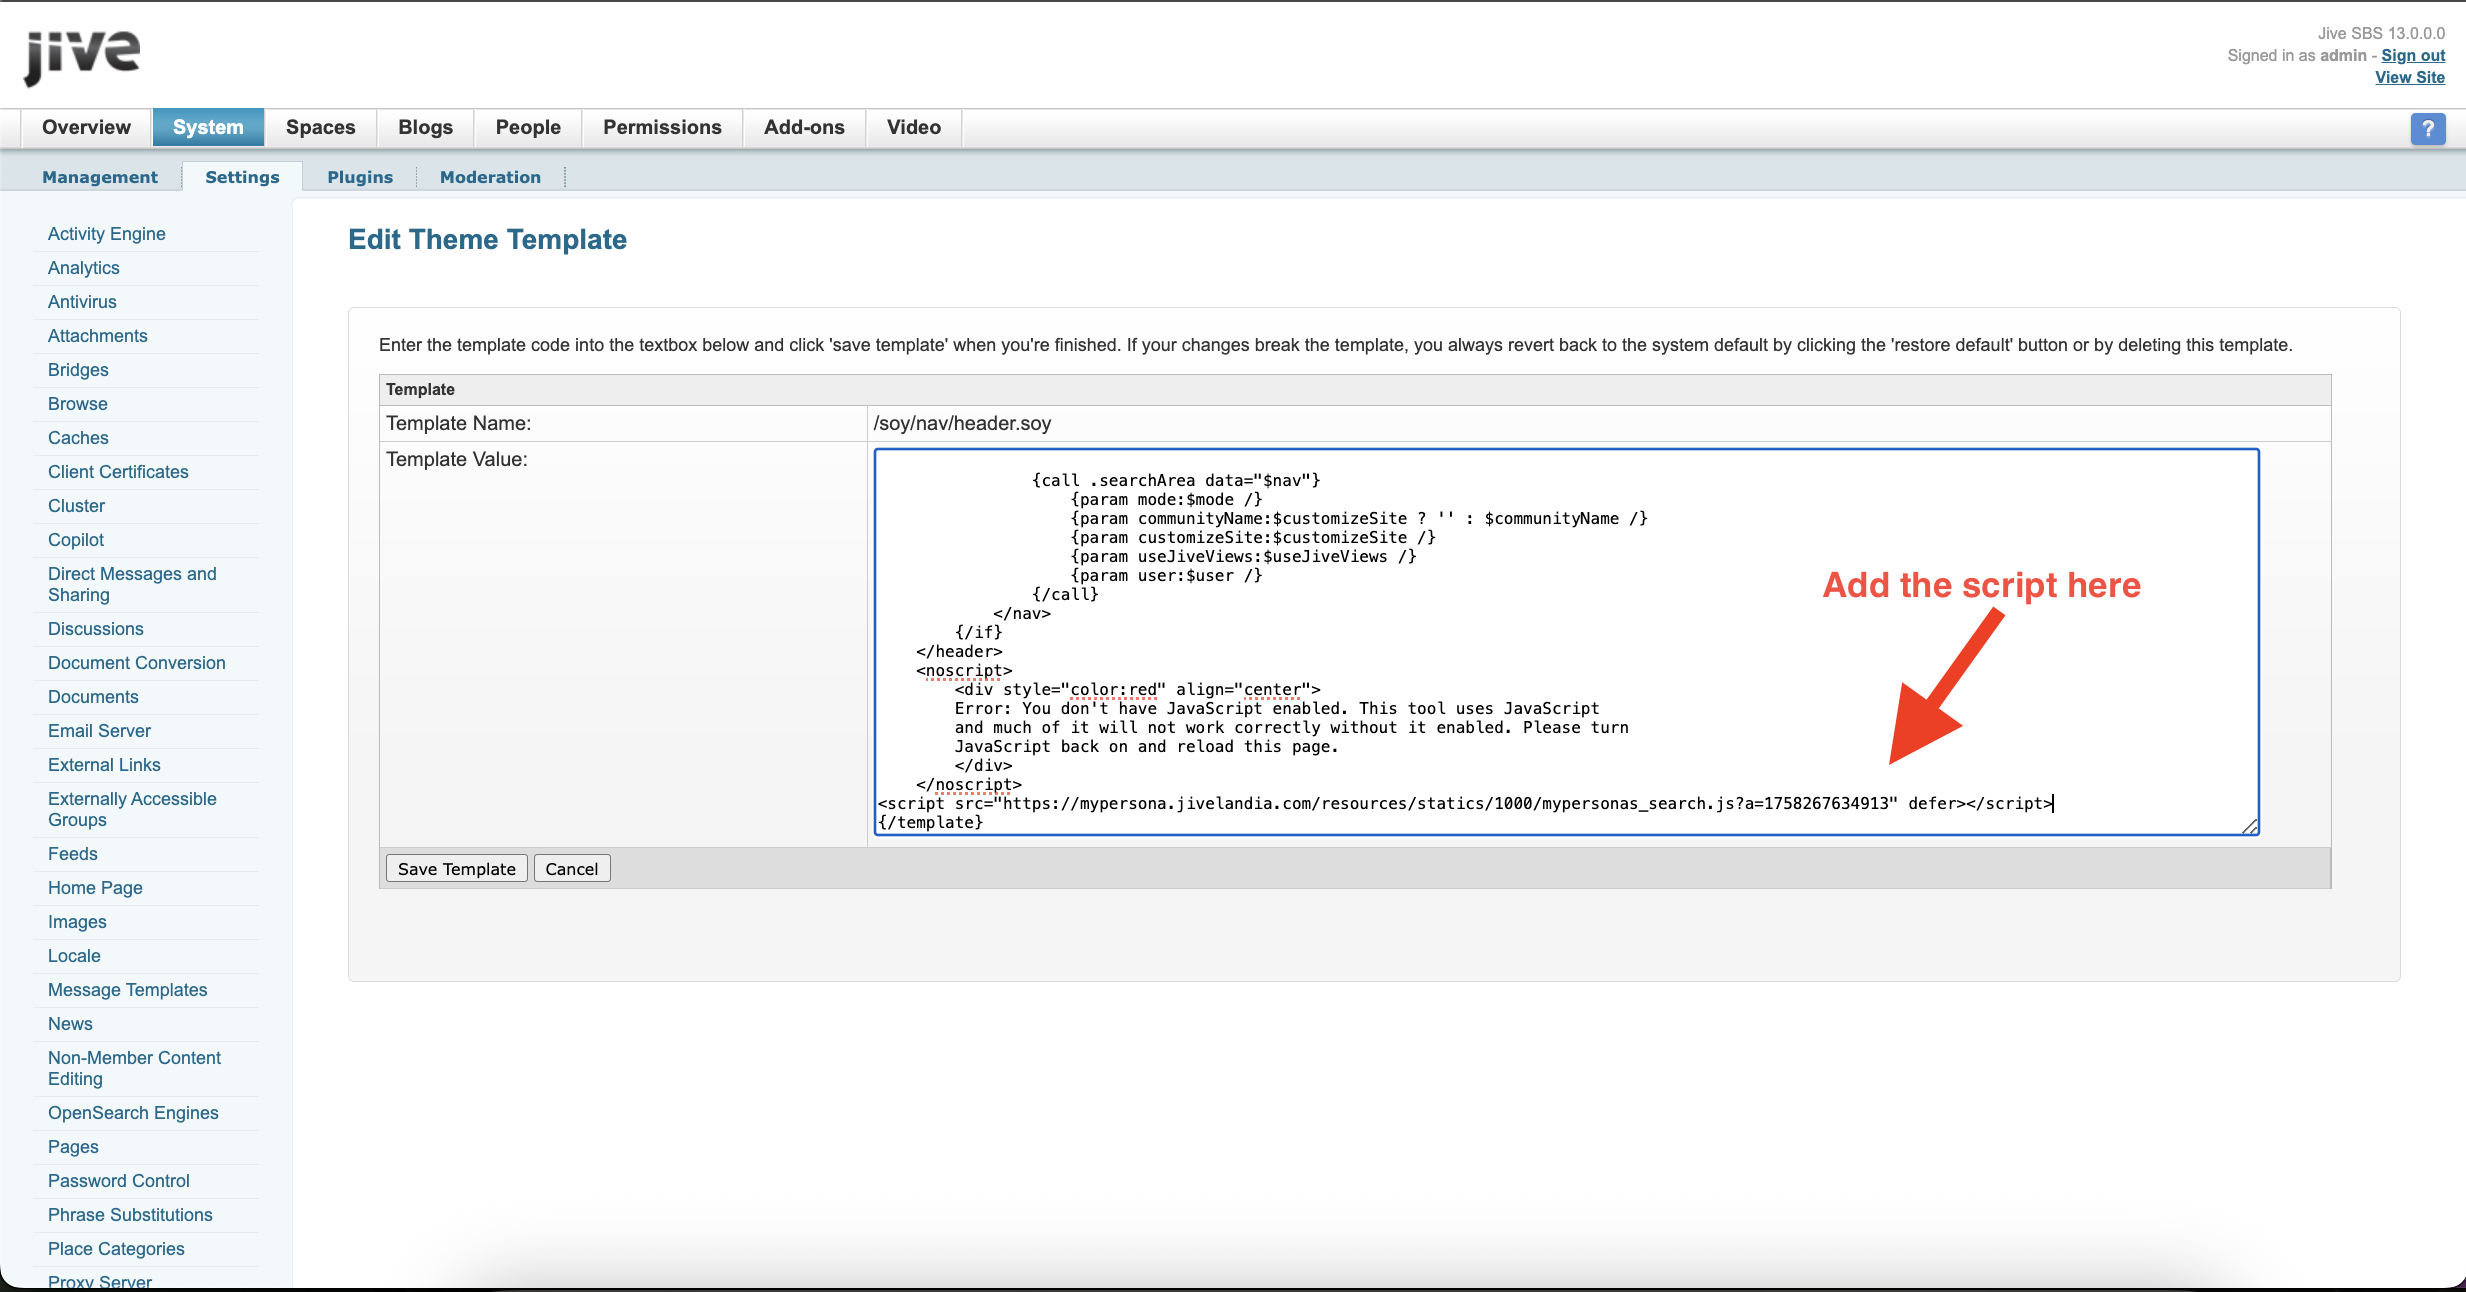
Once synced, copy the script and embed it into your Jive theme.
-
Click on Save and close.
-
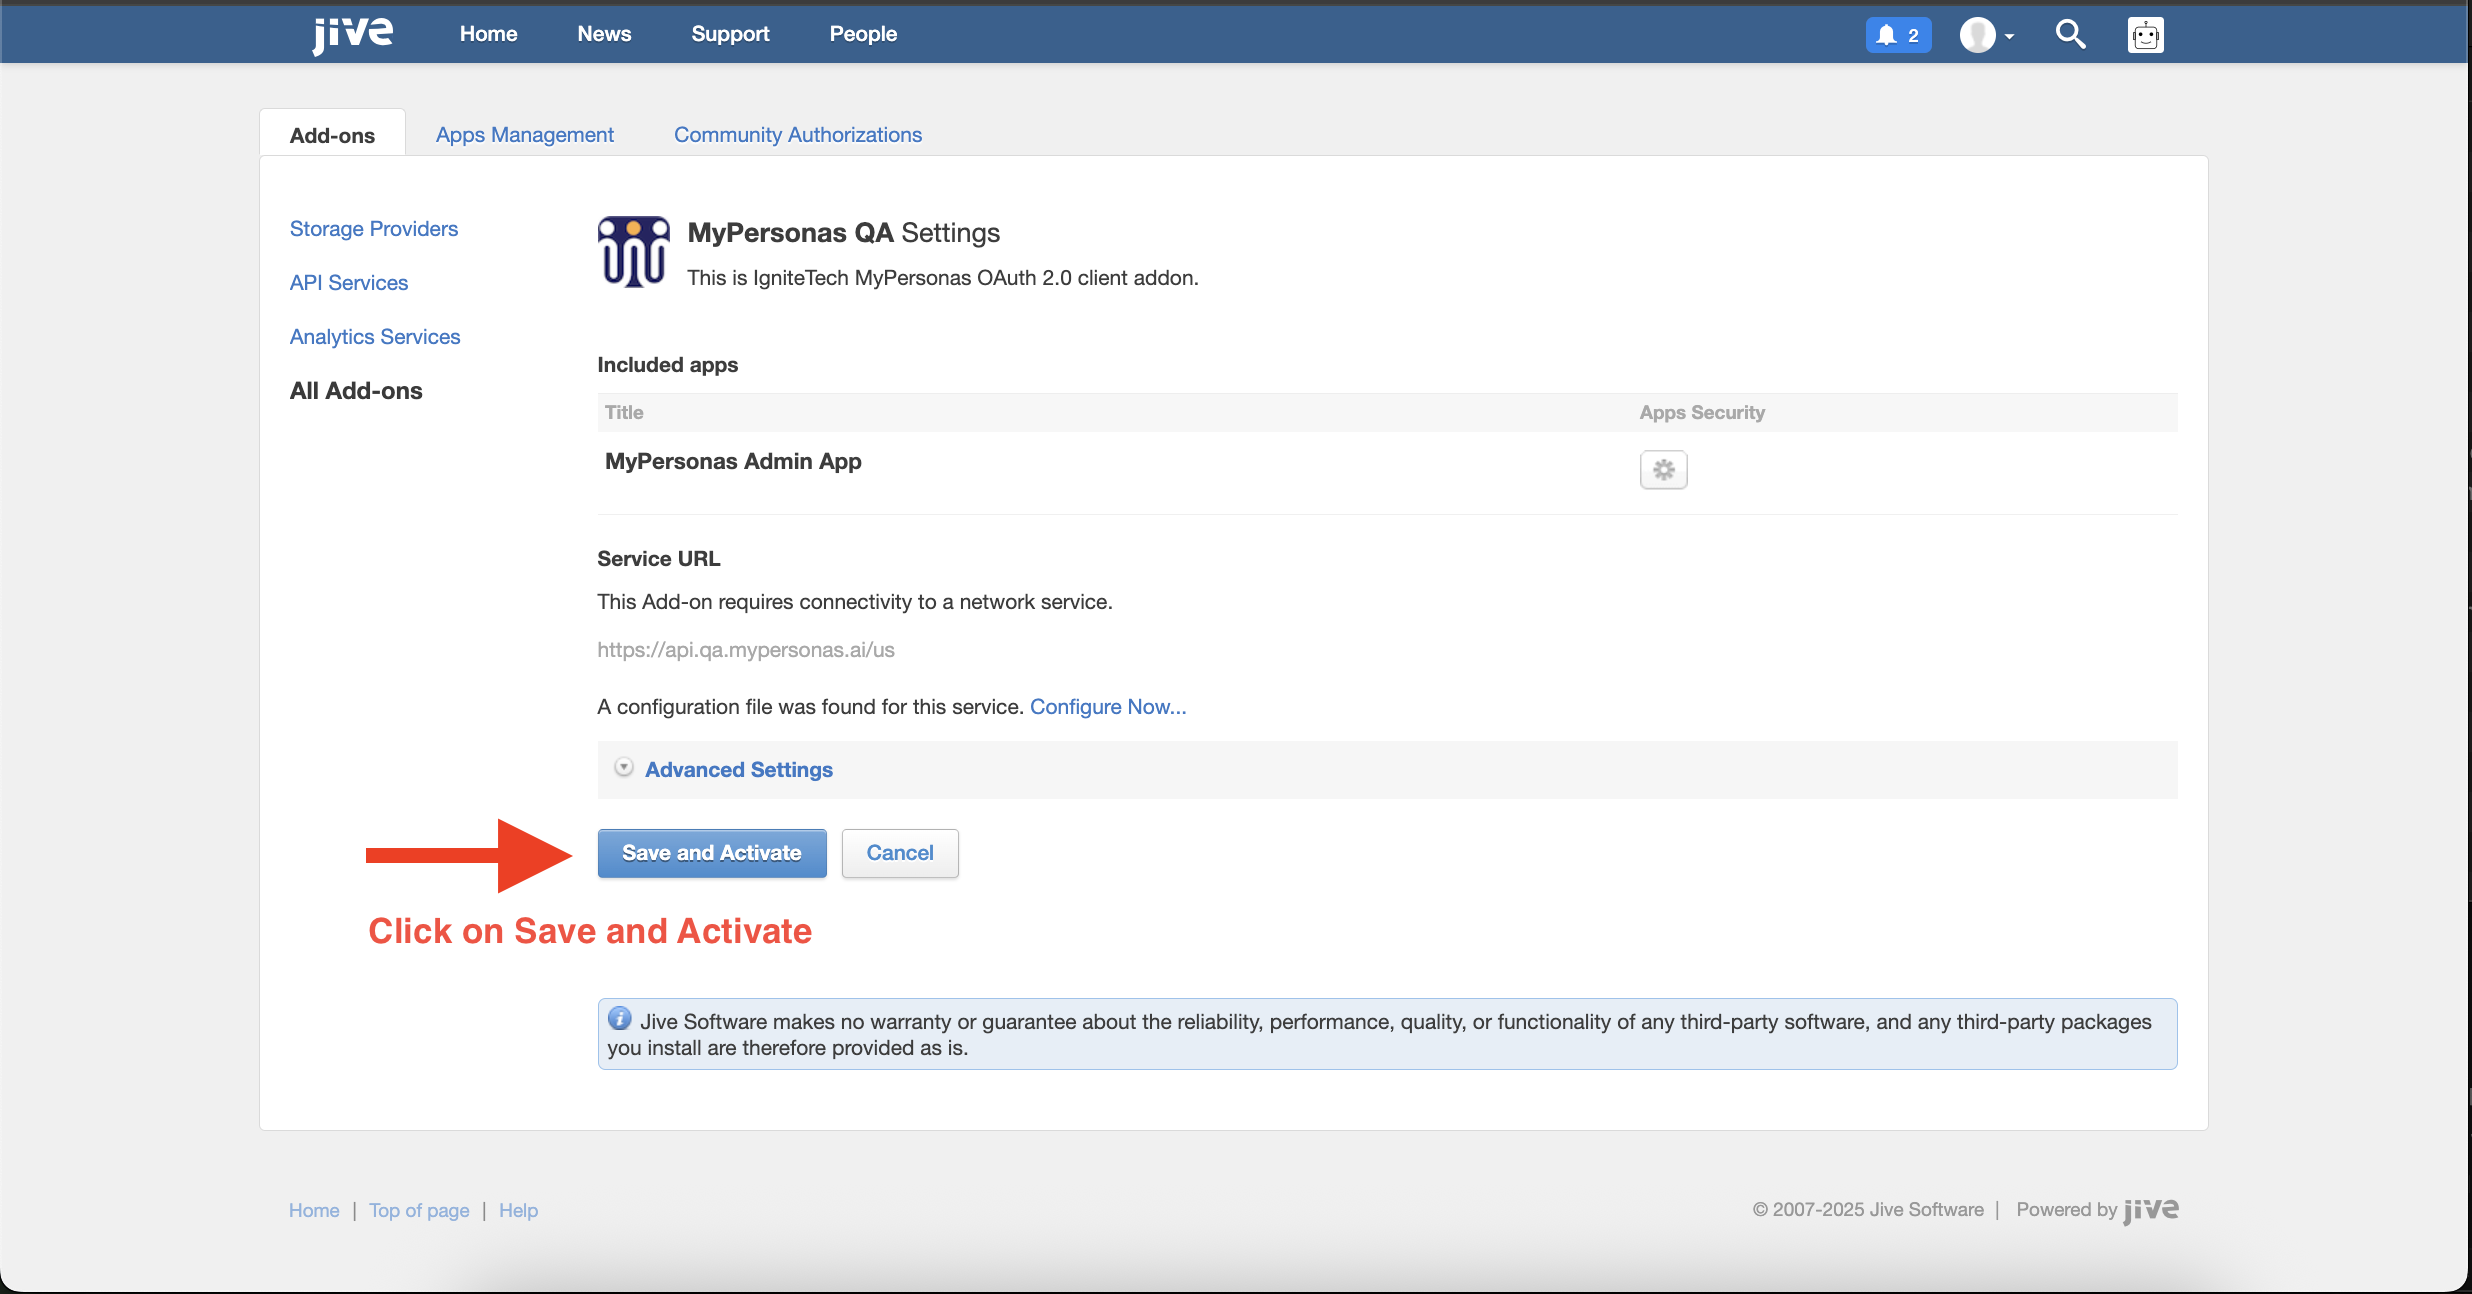
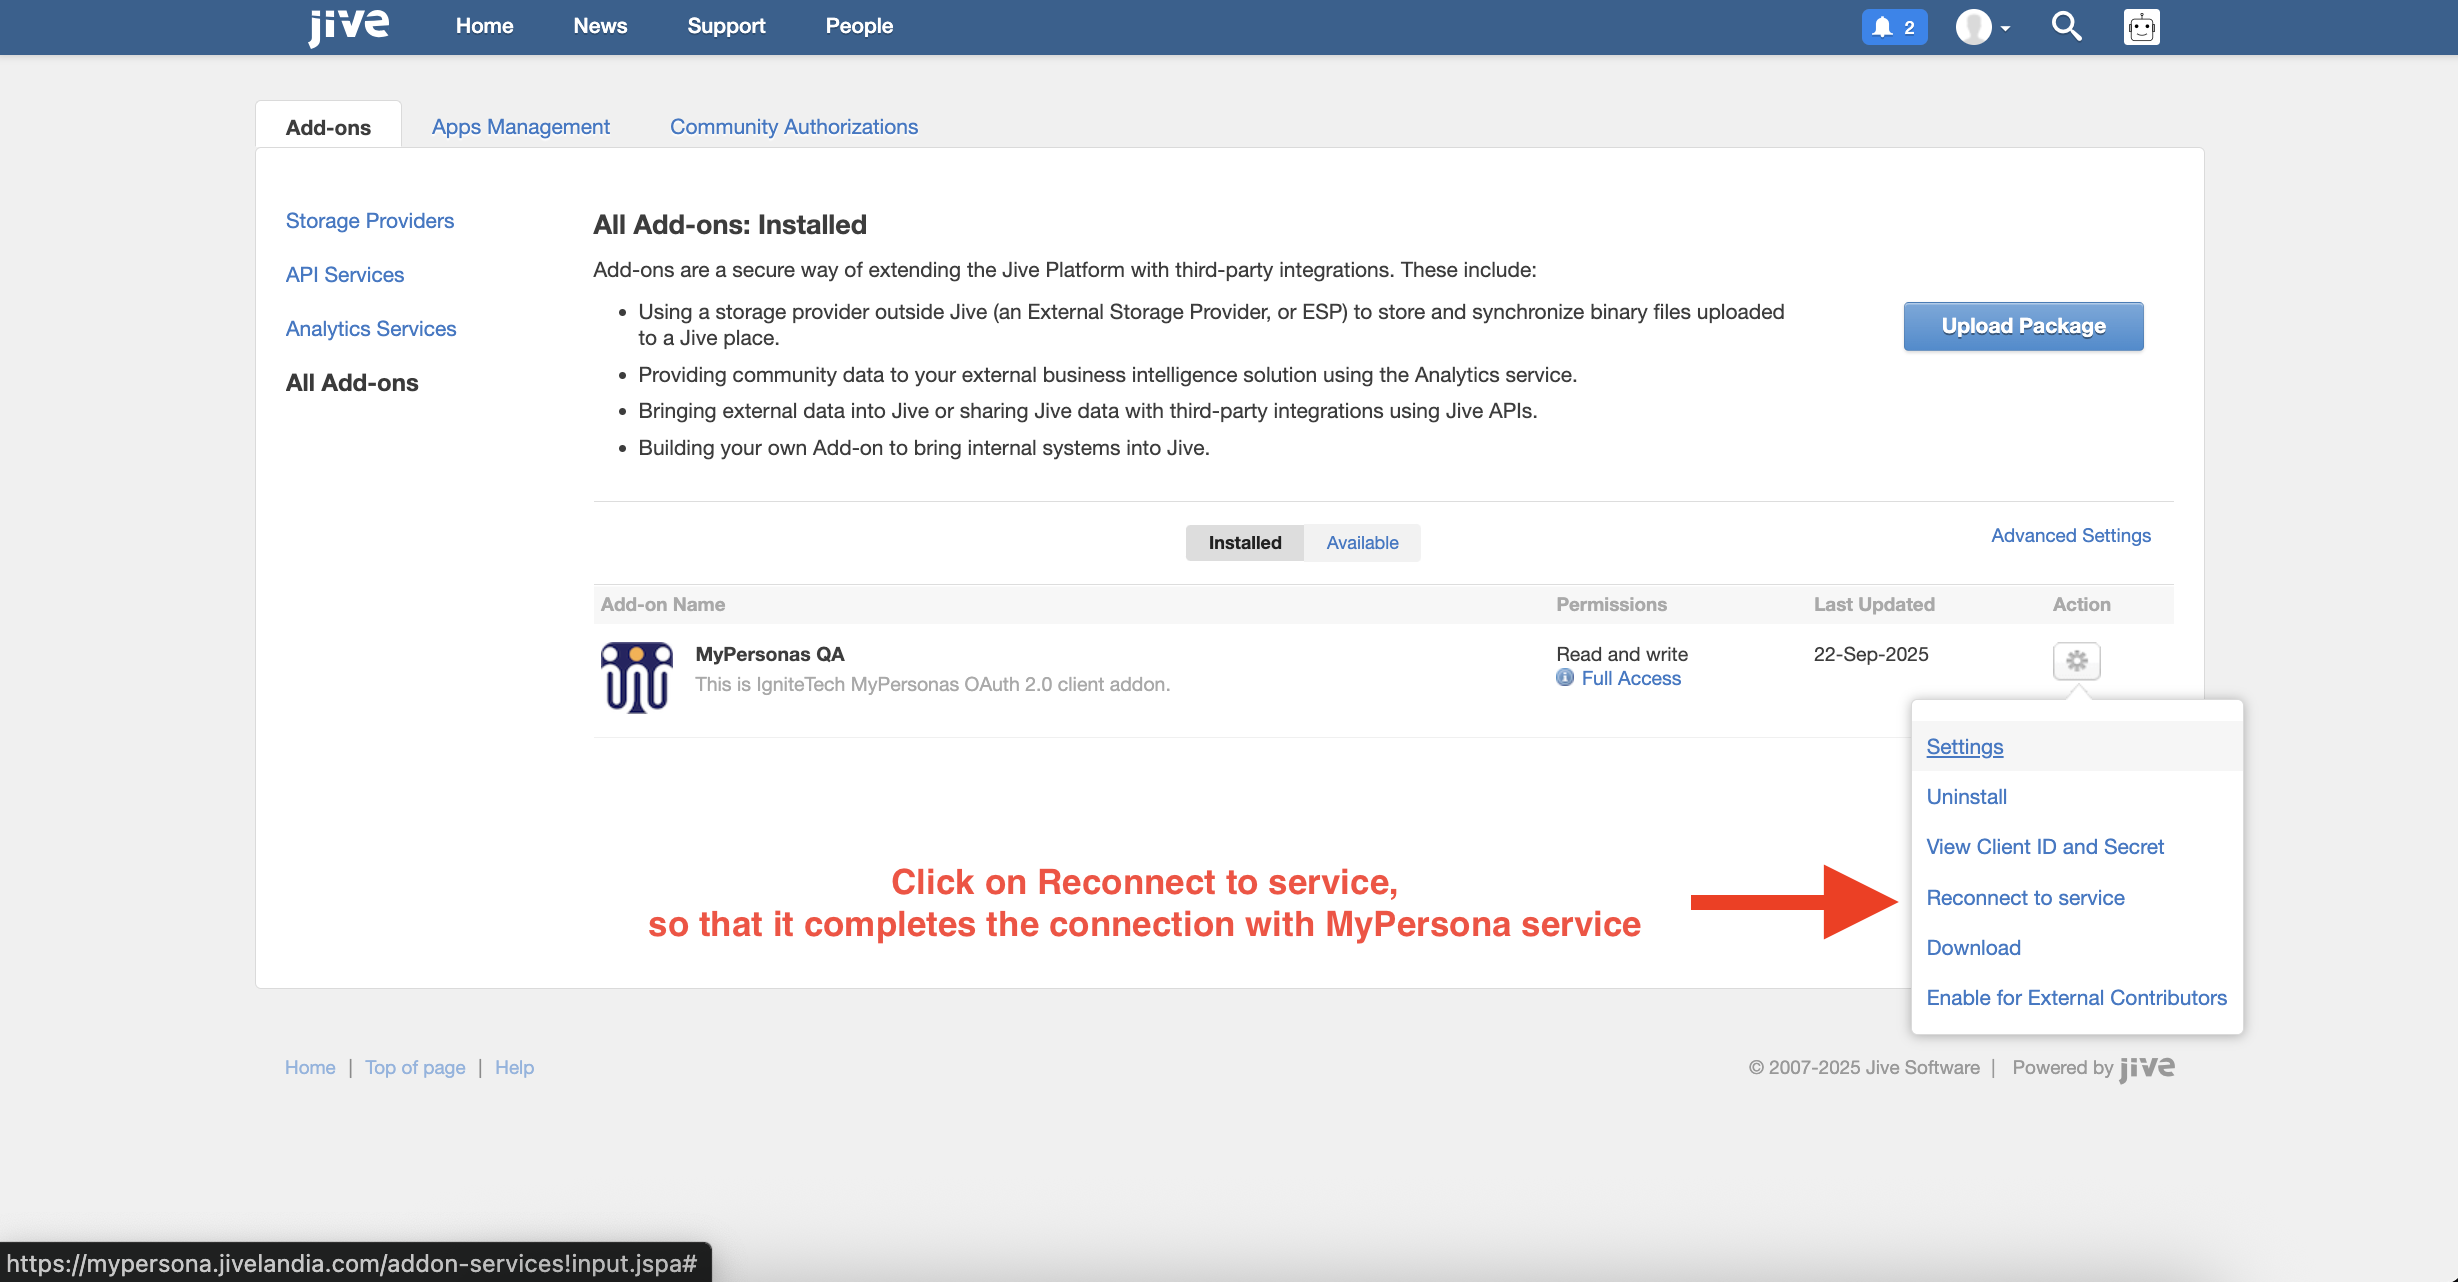
Click on Save and Activate.
-
Once the add-on is activate please reconnect it with the MyPersona service, so that it syncs the jive instance and completes the integration.
5. Adding the Search Script
For Hosted Instances
-
Login as Admin.
-
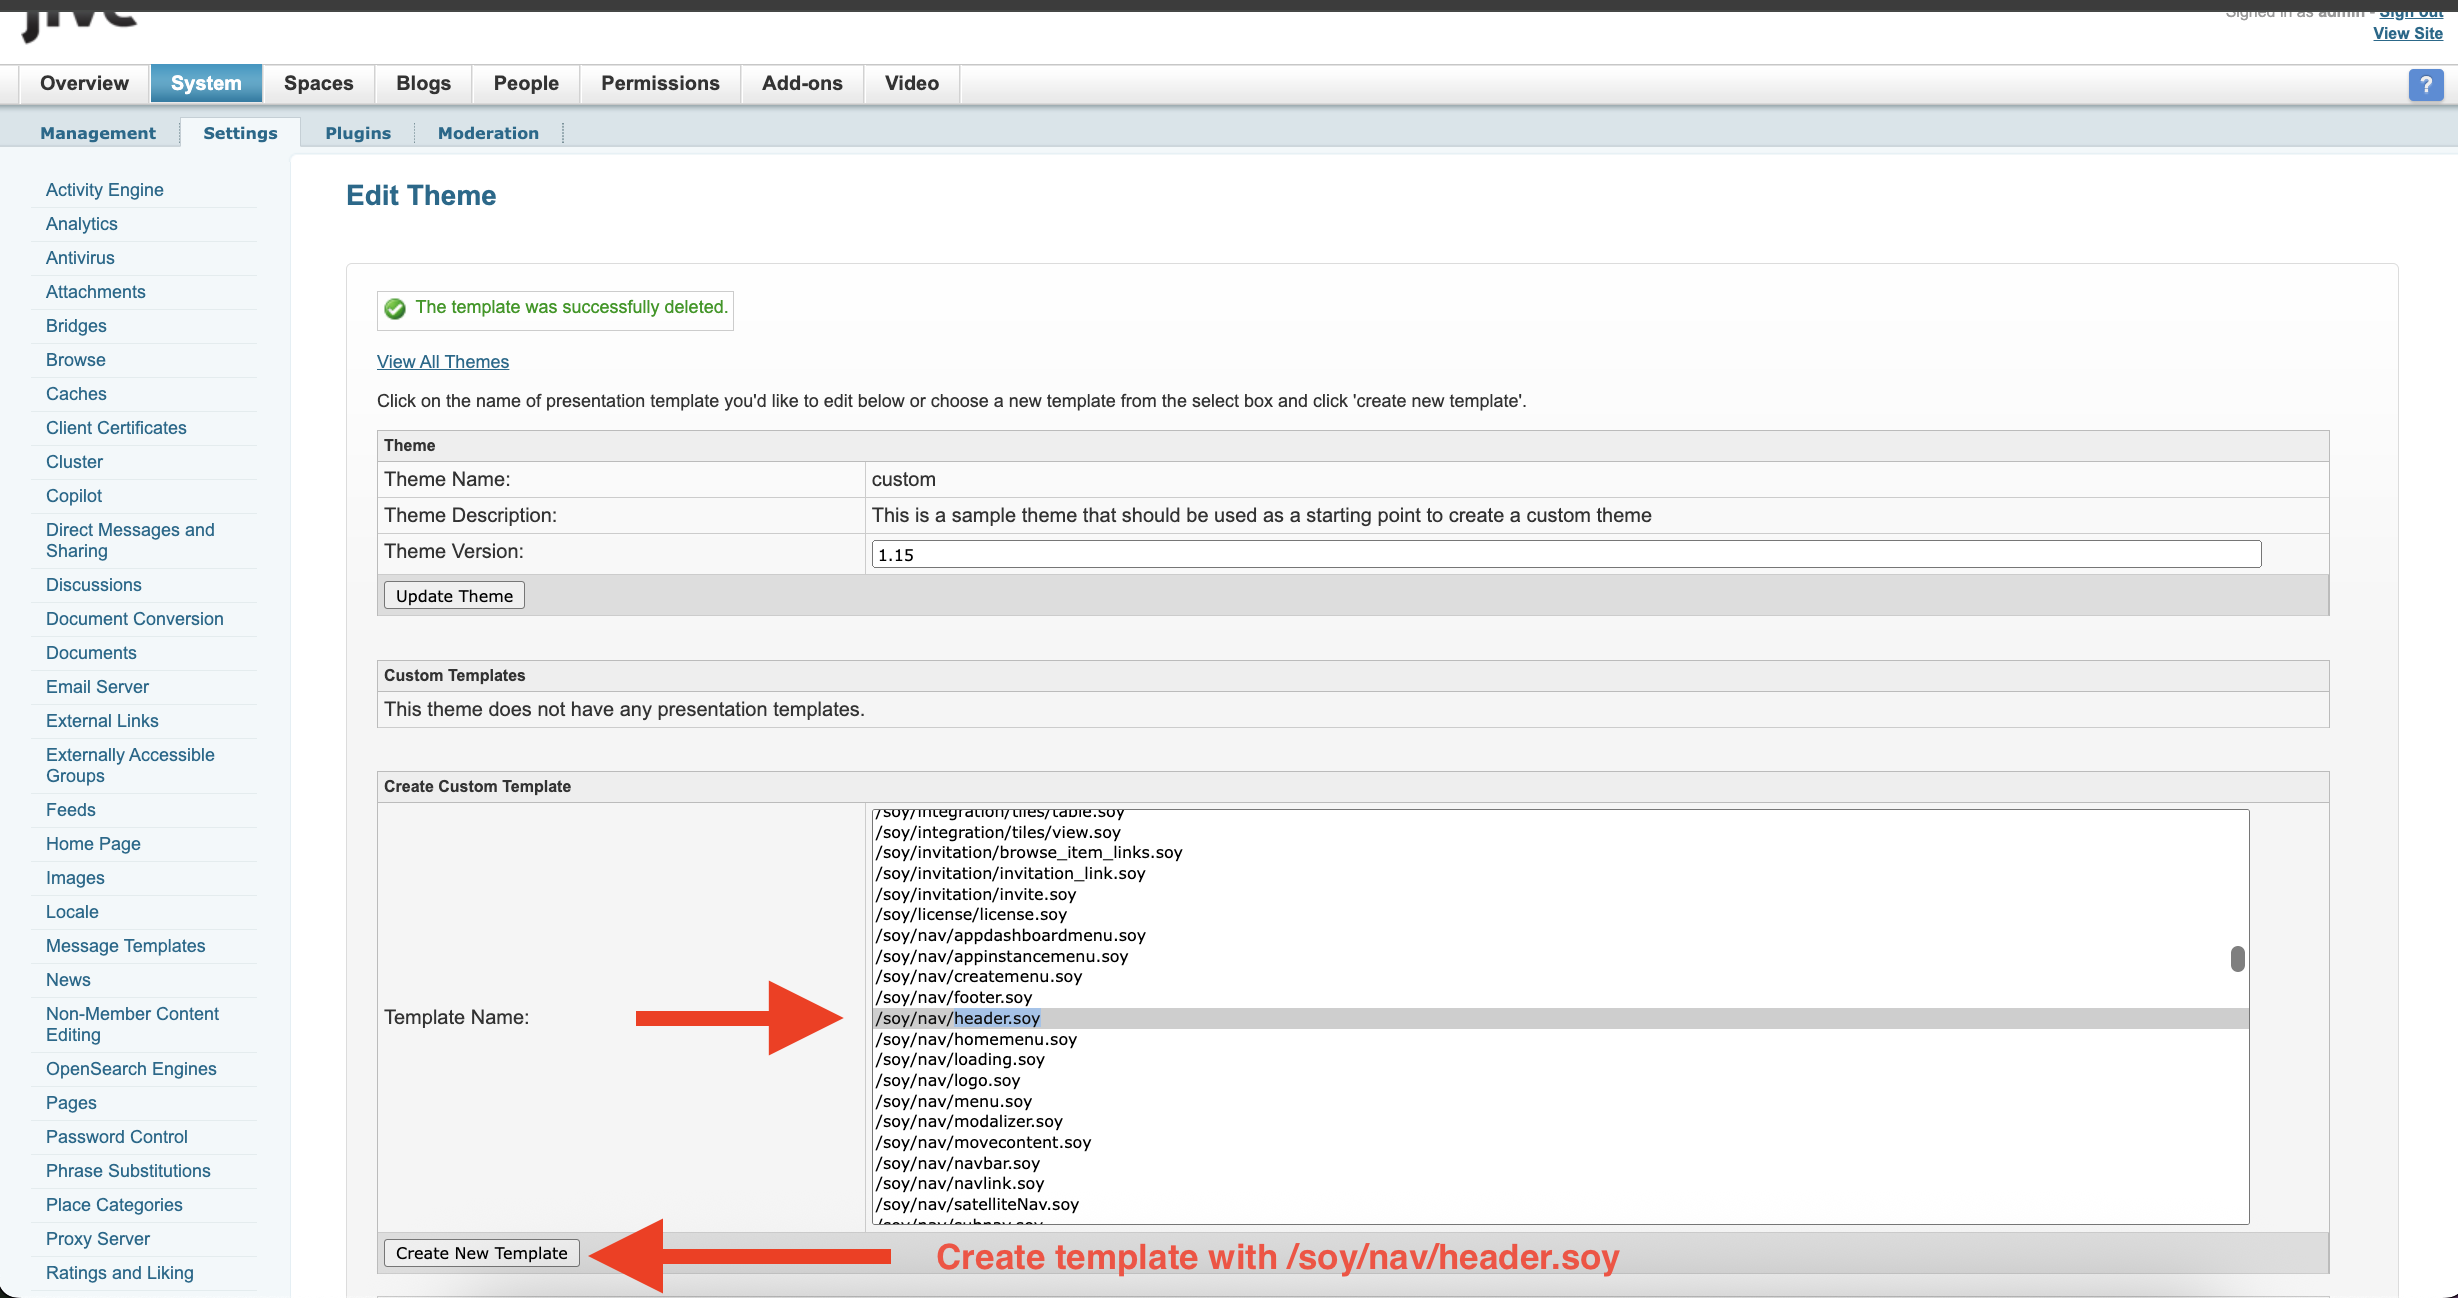
Navigate to: Avatar → Admin Console → System → Settings → Themes.
-
Edit your active theme.
-
Open template:
/soy/header/nav.soy -
Paste the script before:
{/template}
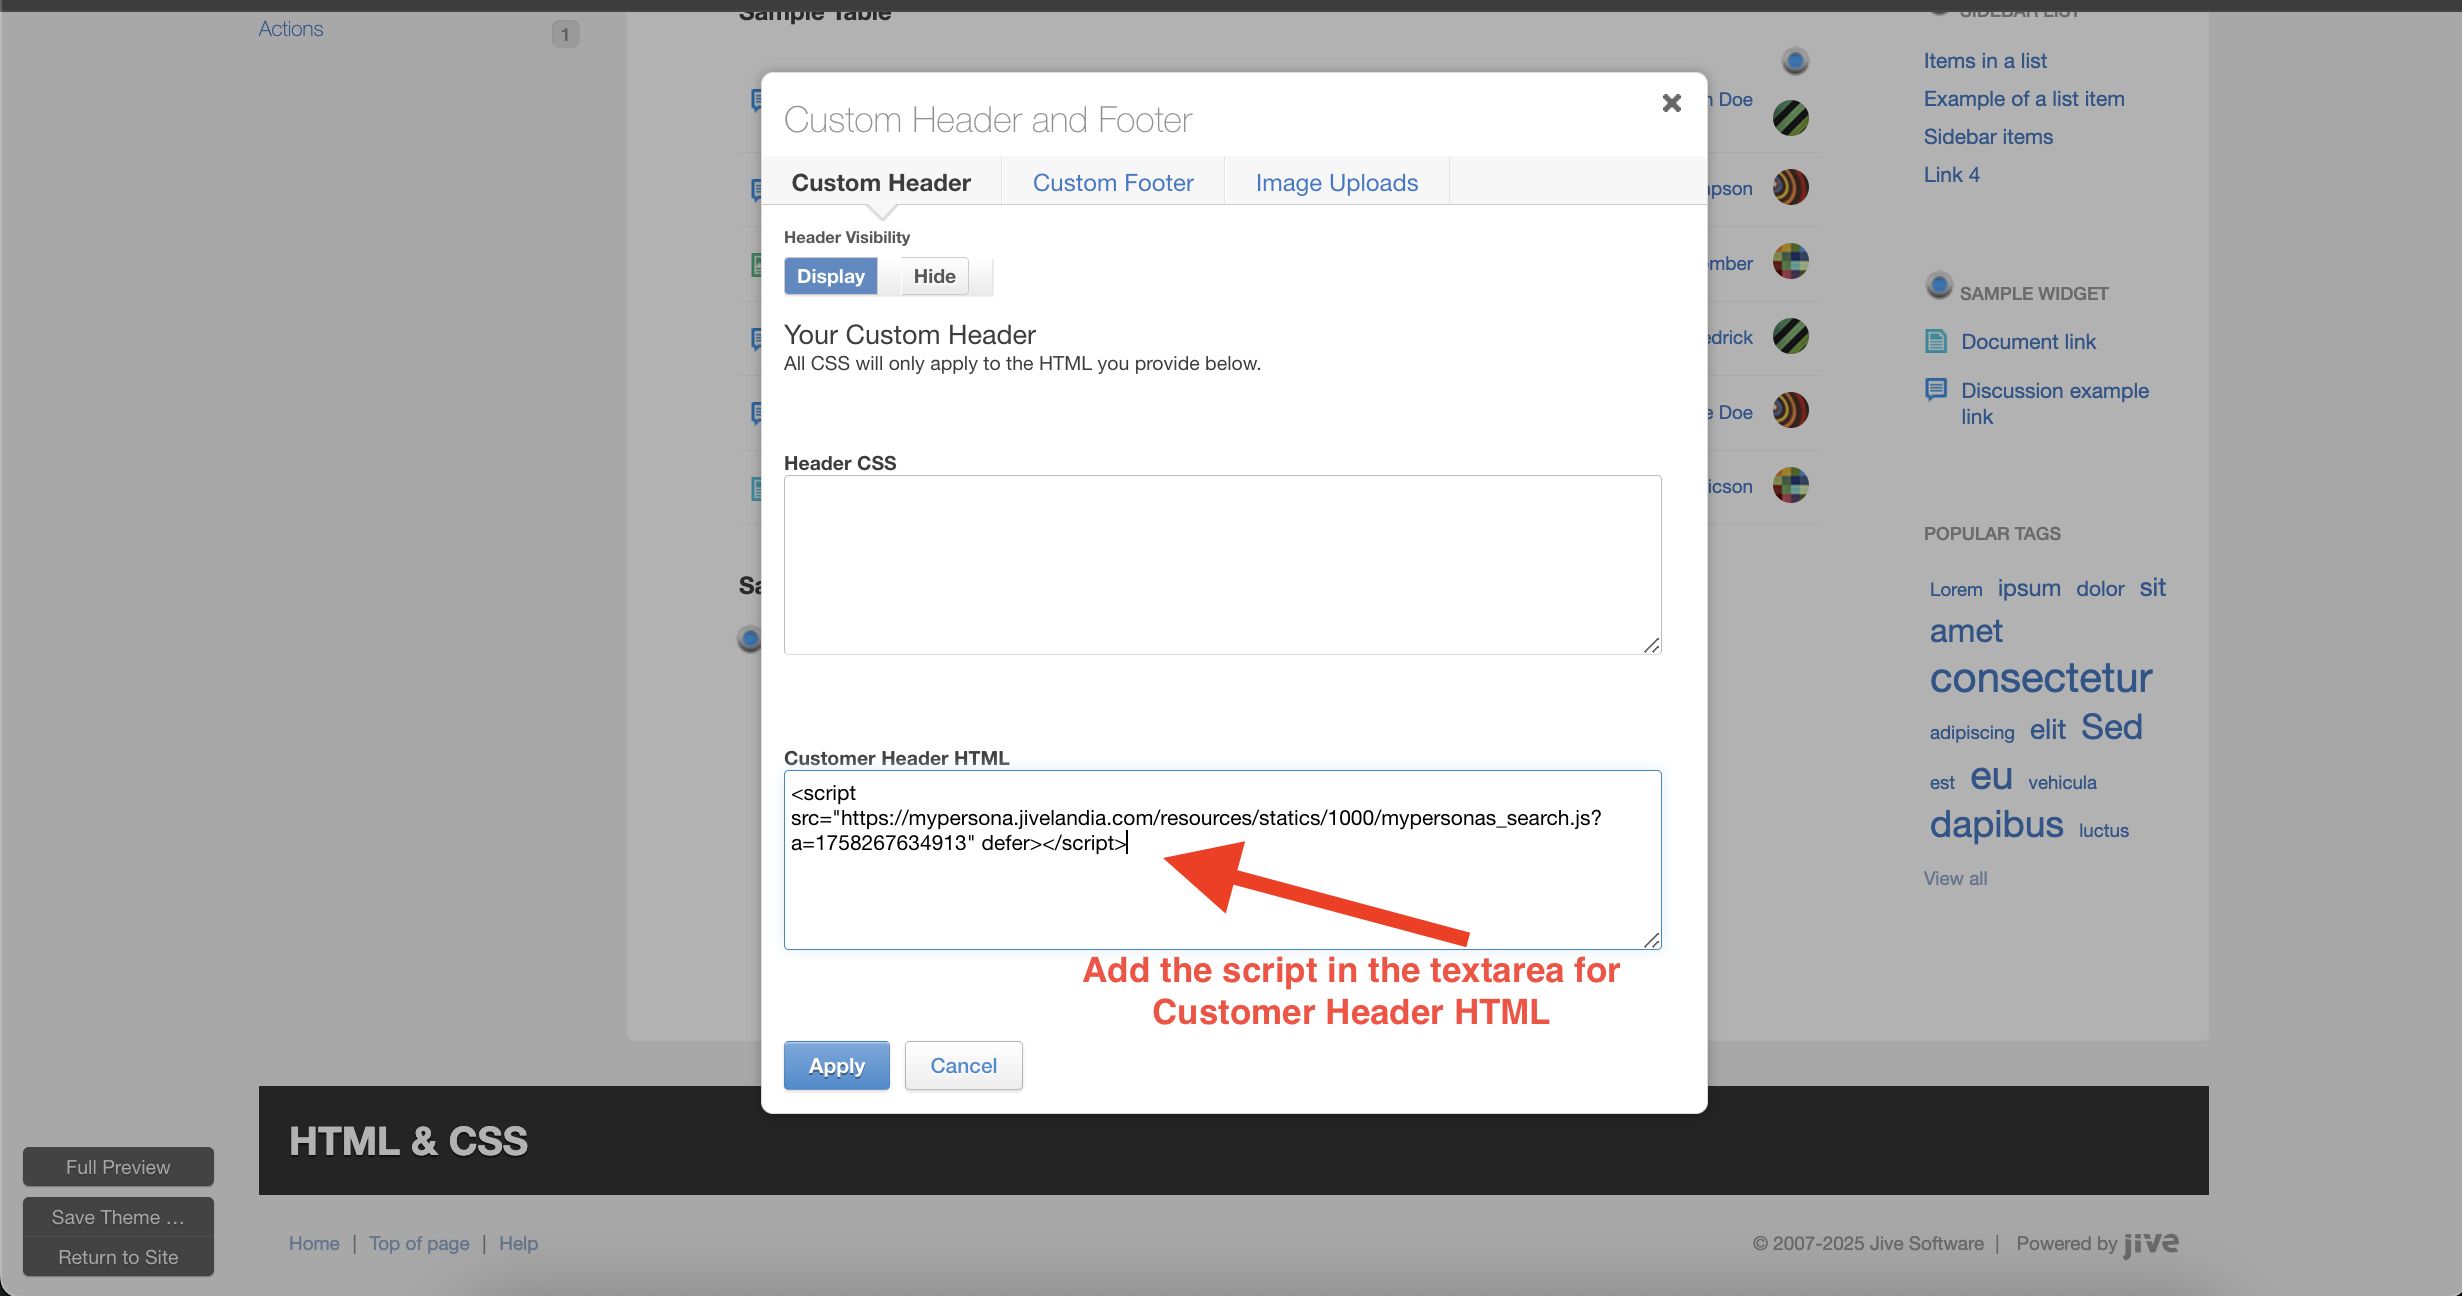
For Cloud Instances
-
Login as Admin to Jive Cloud.
-
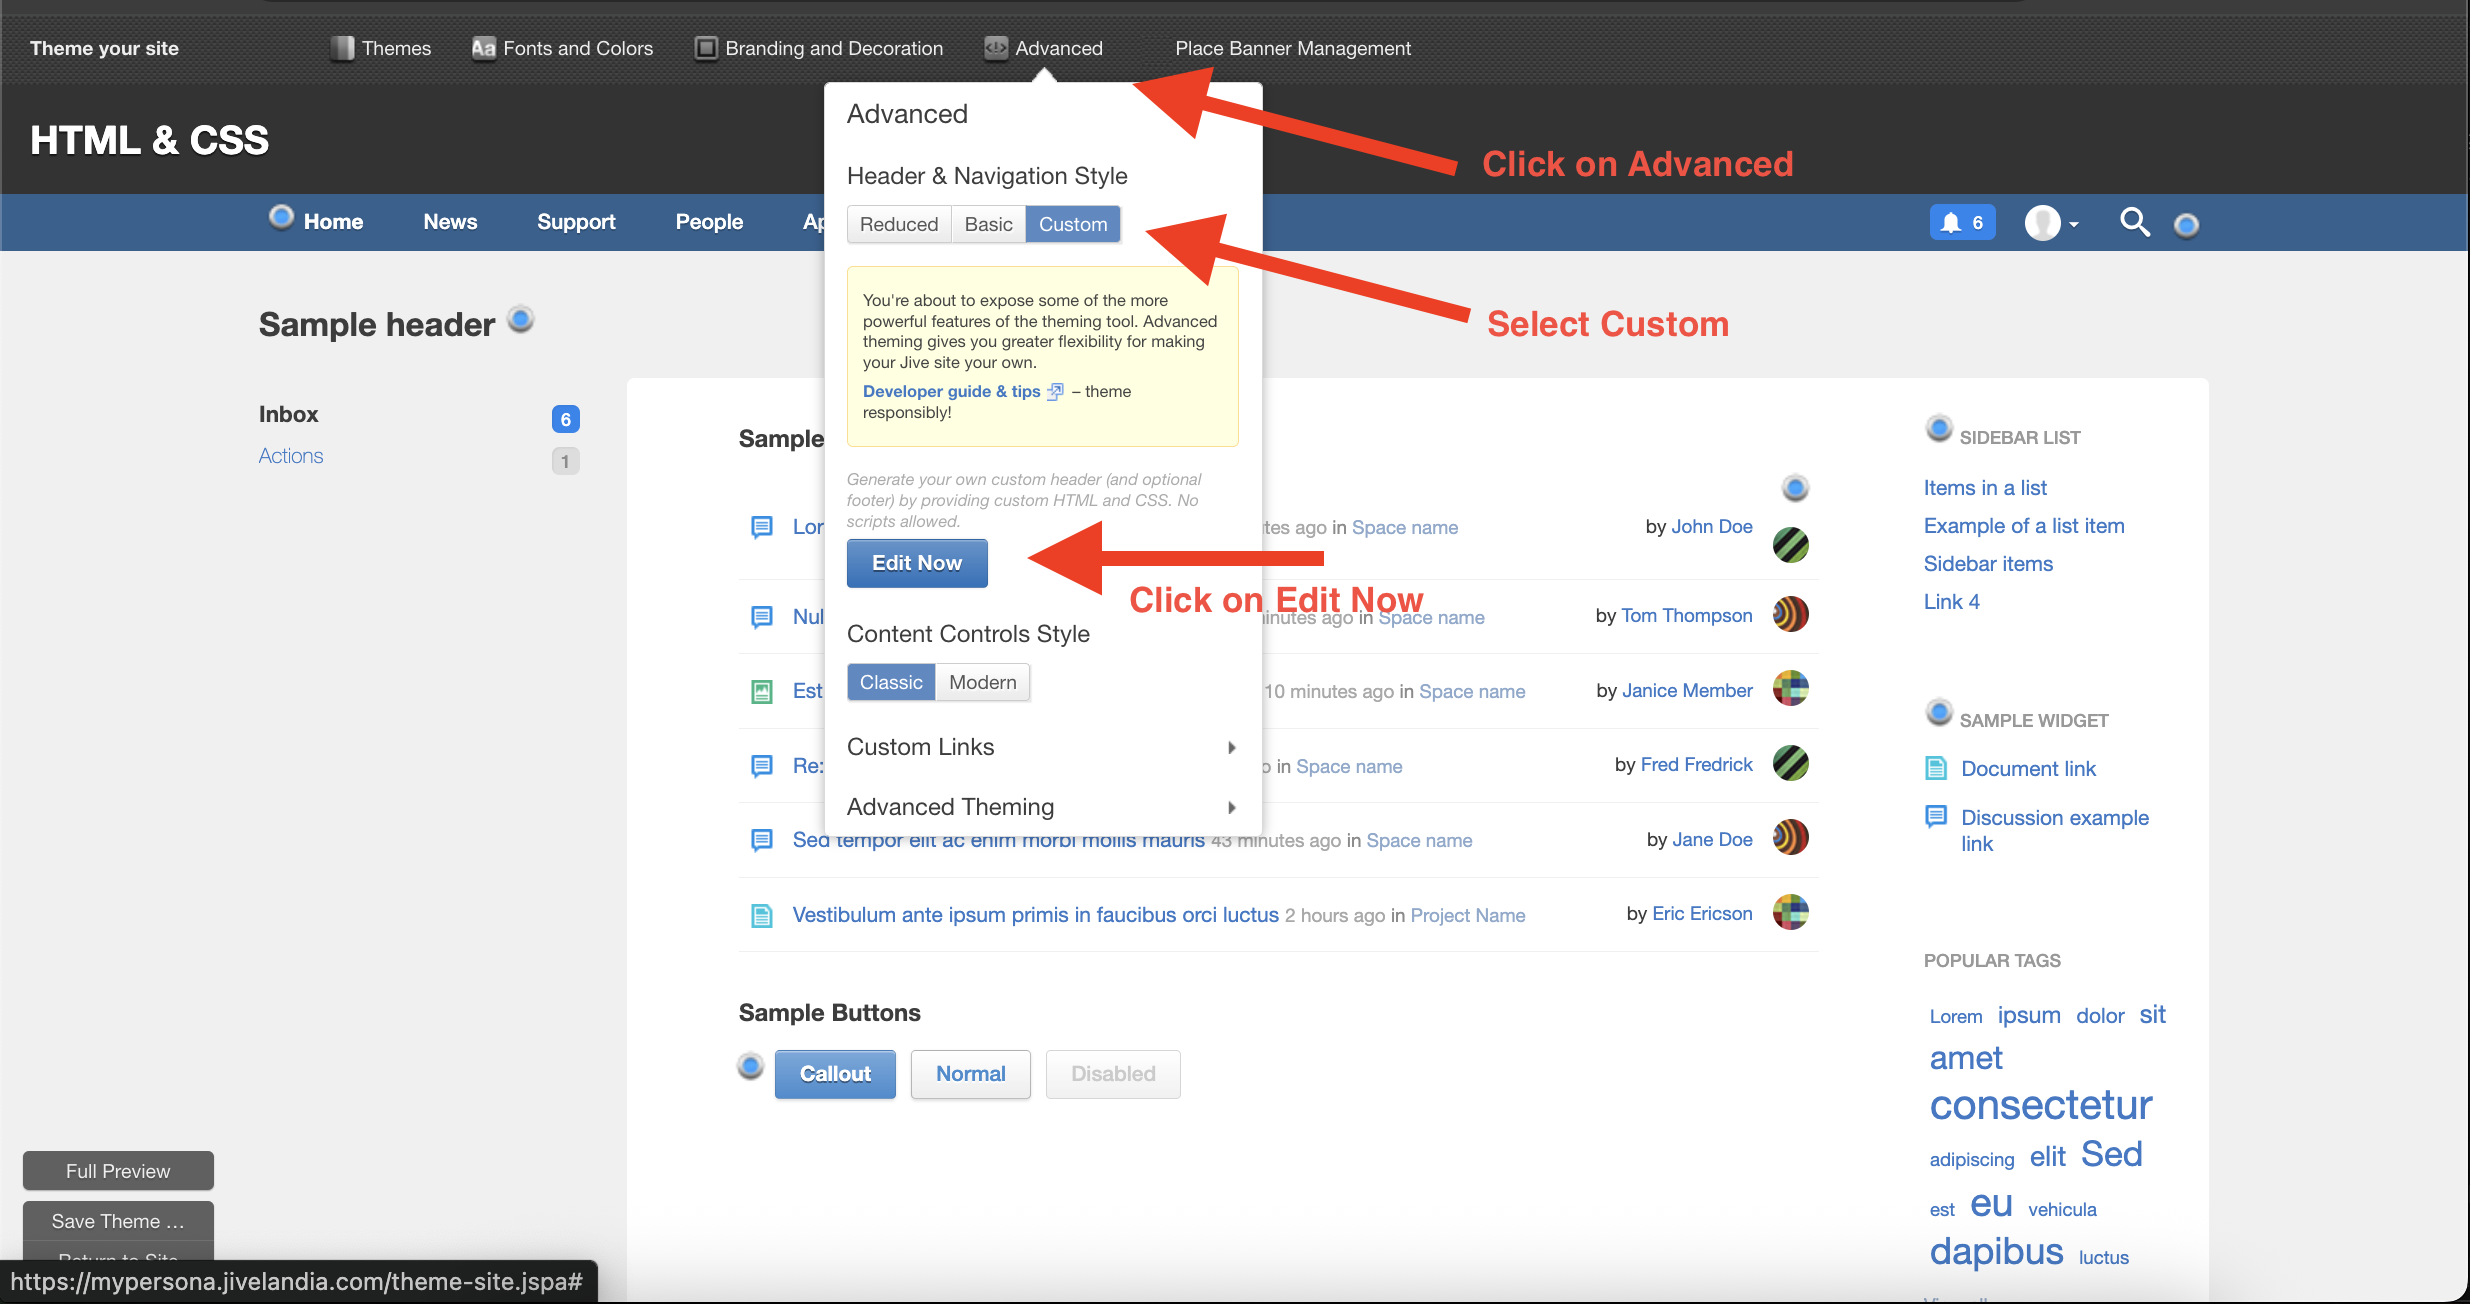
Go to: Avatar → Themes → Advanced.
-
Set Header and Navigation Style to Custom.
-
Click Edit Now.
-
Paste the script in Custom Header HTML.
-
Click on Applya and save the theme.
6. Admin Guide
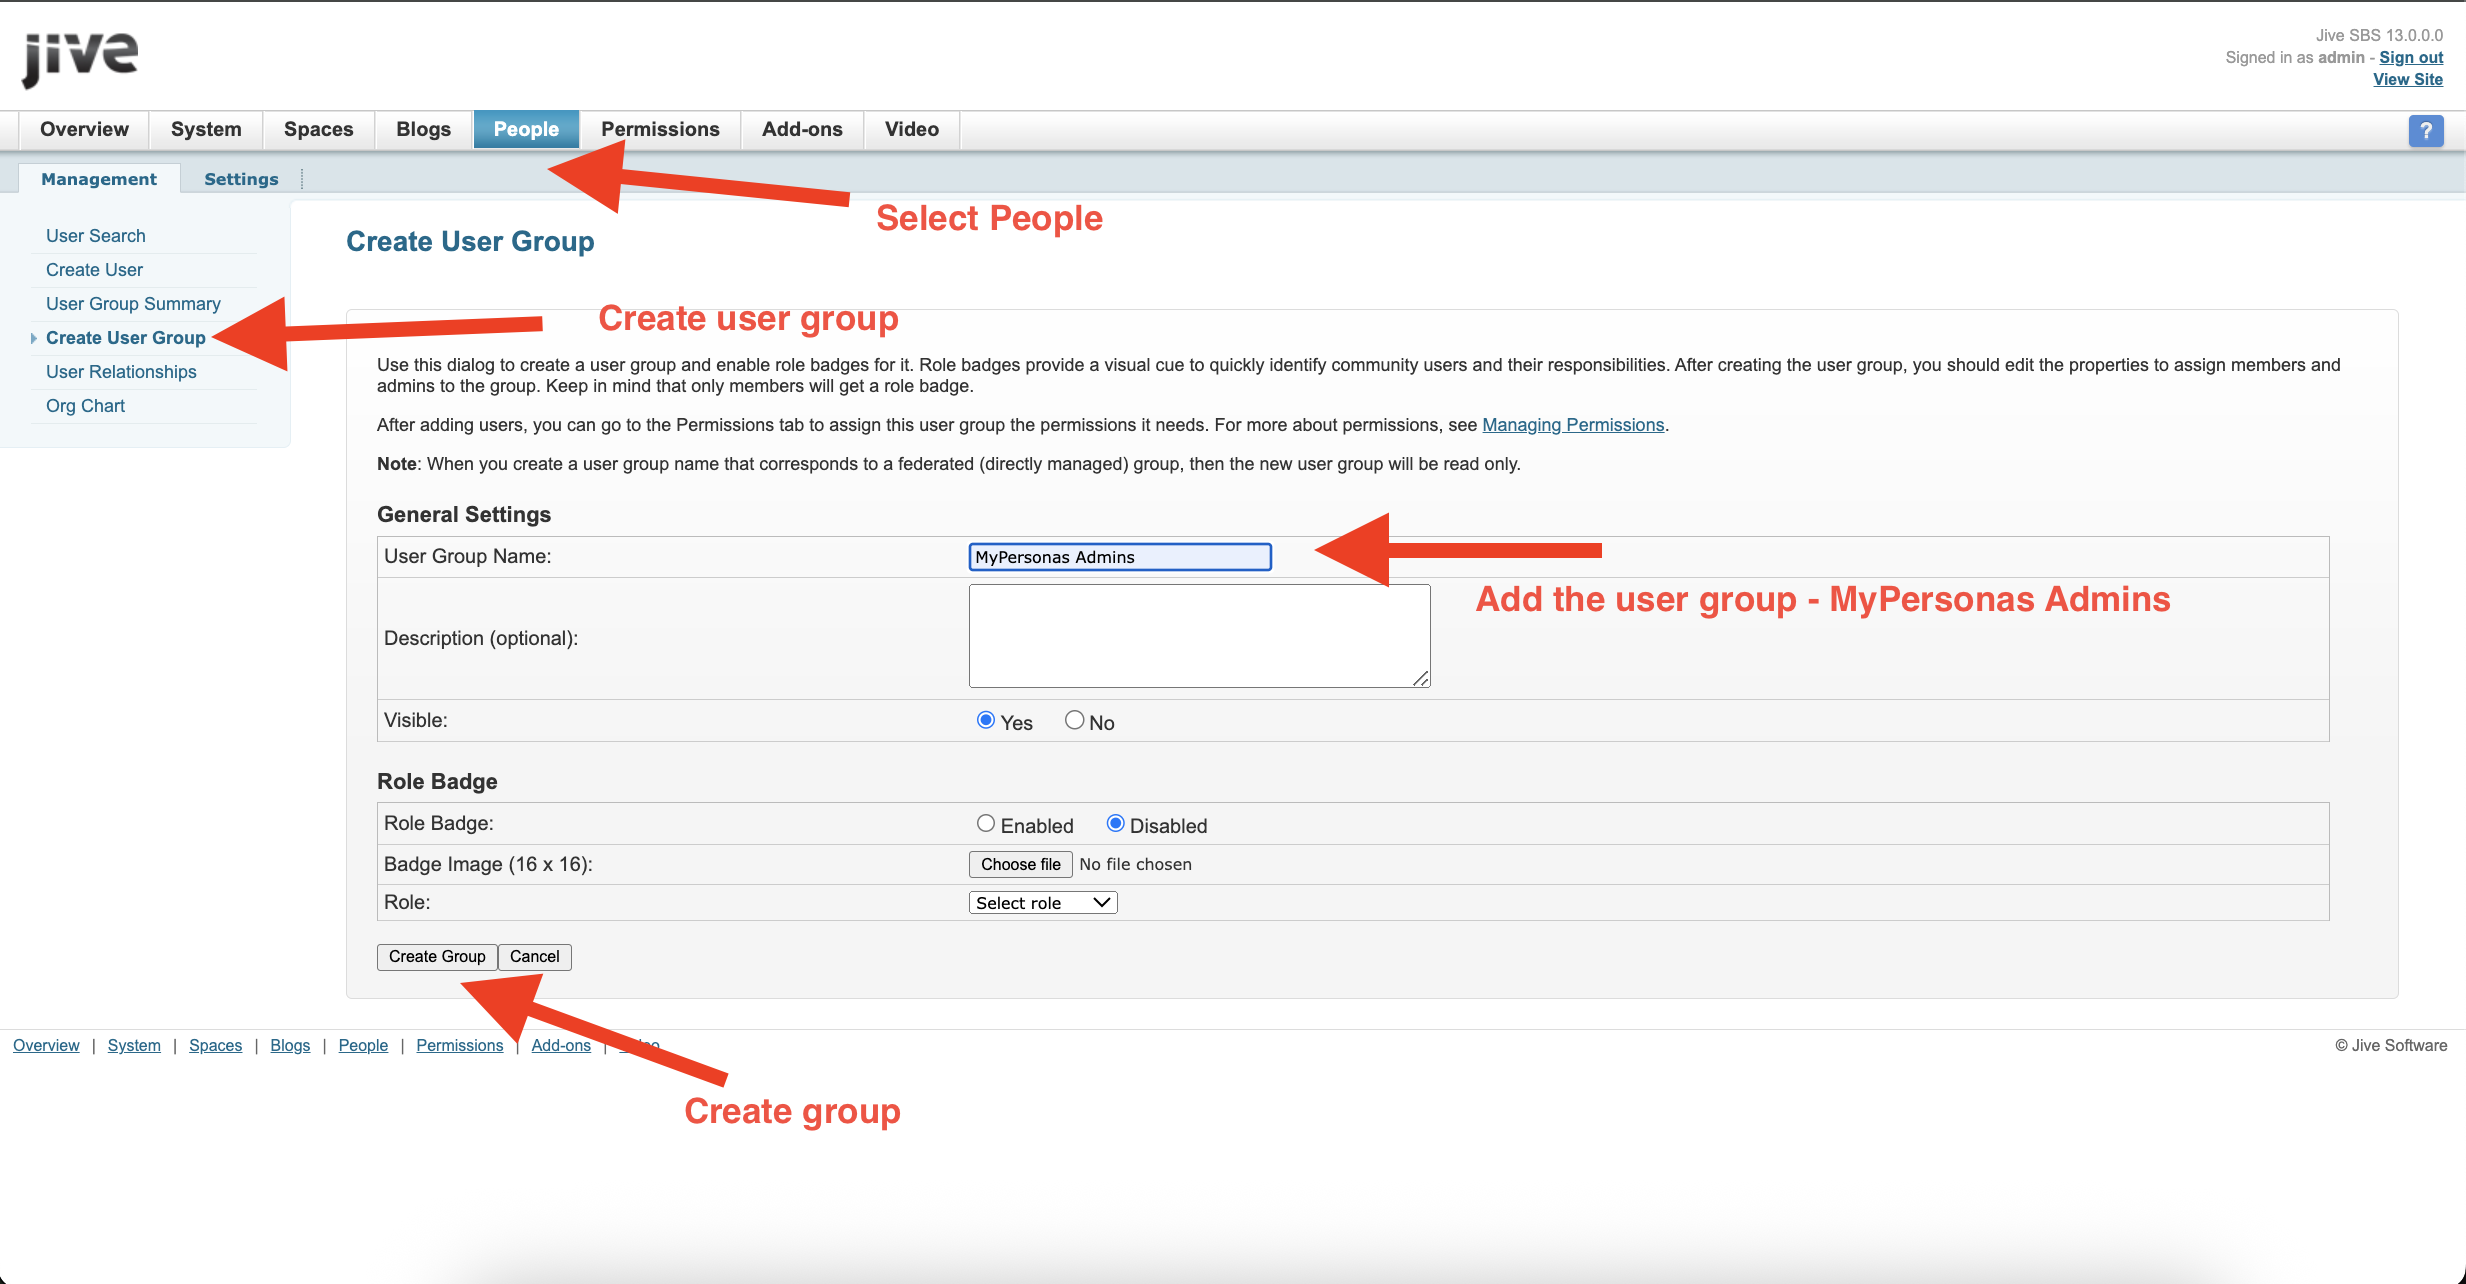
Step 1: Create Admin Group
-
Go to People → User Group Summary → Create User Group.
-
Create a group named:
MyPersonas Admins -
Add administrators who should manage MyPersonas.
Step 2: Accessing the MyPersonas Admin App
-
Direct URL: https://mypersona.jivelandia.com/apps/mypersonas-admin-app
-
Within Jive UI:
-
Click Pencil Icon (top-right navigation).
-
Select MyPersonas Manager.
-
7. Usage
Once configured:
-
Search Integration
-
AI-powered content appears in both Spotlight Search and Advanced Search.
-
-
MyPersona Management
-
Members of
MyPersonas Adminscan manage digital MyPersonas via the Admin App.
-
8. Troubleshooting
| Problem | Cause | Solution |
|---|---|---|
| Add-On upload fails | Invalid or missing jiveSignature |
Regenerate signature, update definition.json, re-zip and upload. |
| Search not showing AI results | Script not added or synced | Re-sync script in Add-On config, ensure script is correctly pasted. |
| Cannot access Admin App | User not in MyPersonas Admins group |
Add the user to MyPersonas Admins via Admin Console. |
| License/Org ID errors | Incorrect values entered | Recheck values provided by Support and reconfigure. |
9. Summary
The Jive Add-On for MyPersonas makes AI-powered knowledge instantly available in Jive search while providing secure administrative management. By following this guide, you can quickly install, configure, and maintain the integration.
Hemant Manwani
Comments