Authenticated Website Integration allows you to embed a MyPersona directly into a secure, login-protected website. This ensures that each user’s identity is recognized, enabling personalized interactions and persistent conversation history.
Prerequisites
Before starting, make sure you have:
-
Access to the MyPersonas Dashboard
-
An authenticated website (e.g., WordPress, custom application, intranet)
-
Ability to edit your website’s header HTML or equivalent injection point
-
(Optional) Framework knowledge if using React, Vue, Next.js, Nuxt, or Svelte
Step 1: Create a New Integration
-
Go to your MyPersonas Dashboard.
-
Navigate to Integrations from the sidebar.
-
Click New Integration.
-
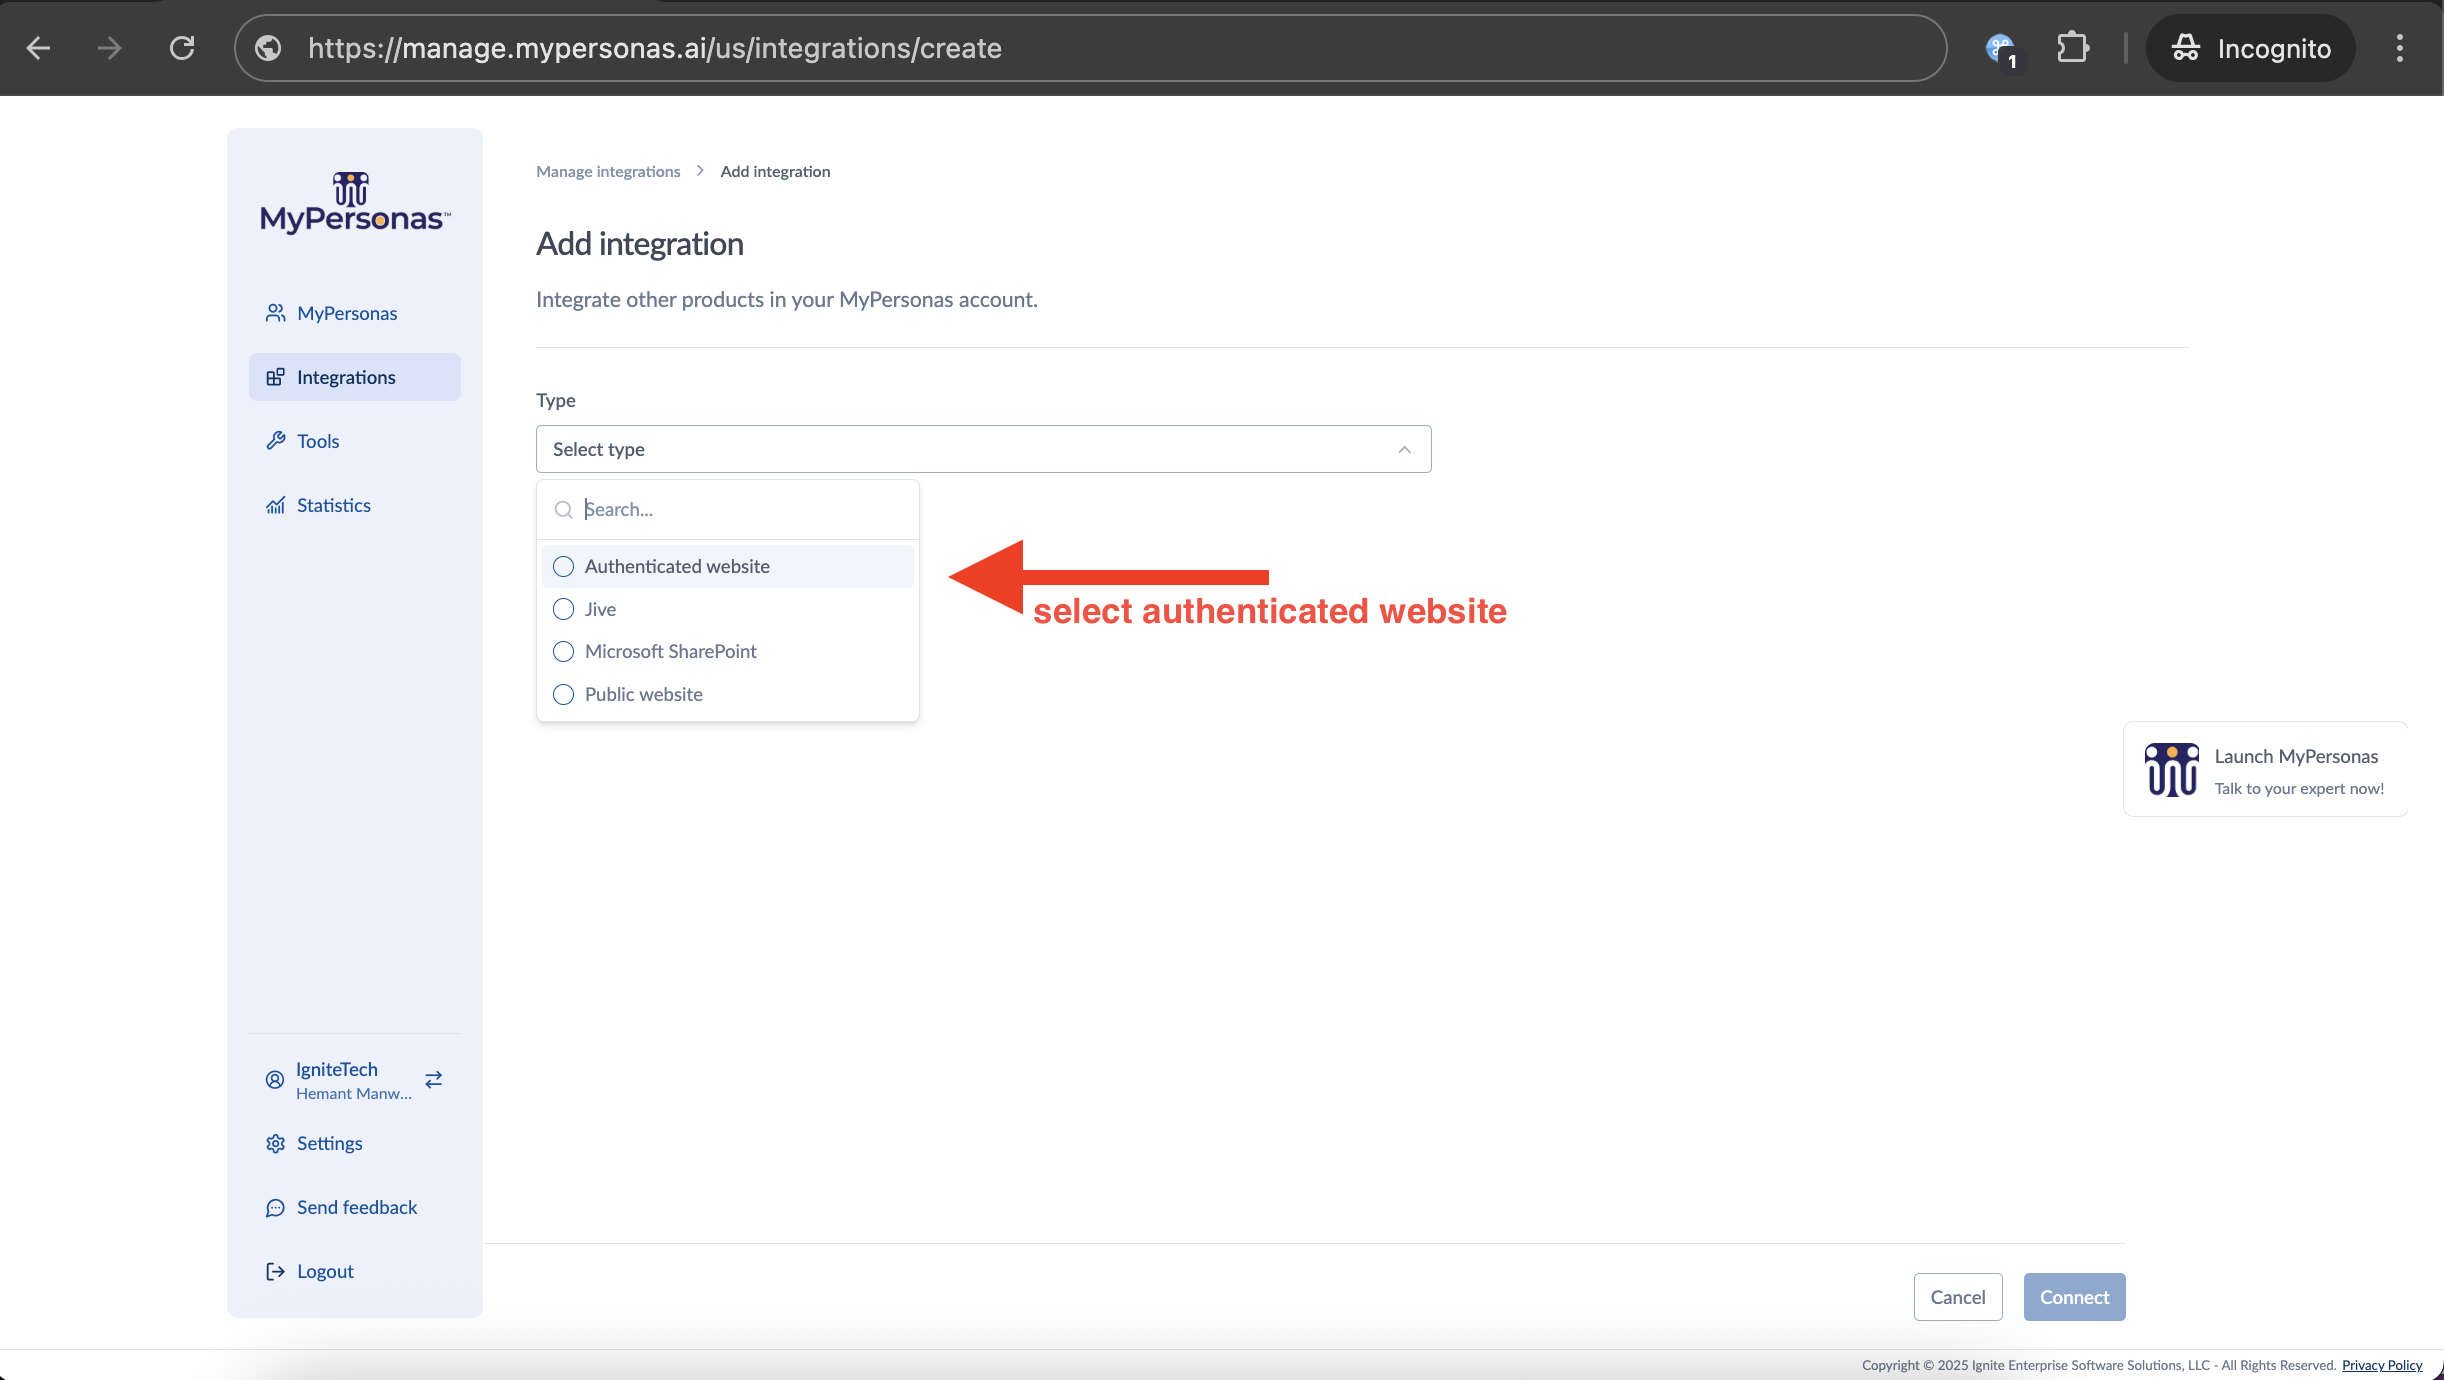
From the Type dropdown, select Authenticated Website.
Other available options:
Public Website – For non-authenticated pages
Jive – For Jive community integrations
Microsoft SharePoint – For SharePoint sites
Step 2: Provide Website Details
-
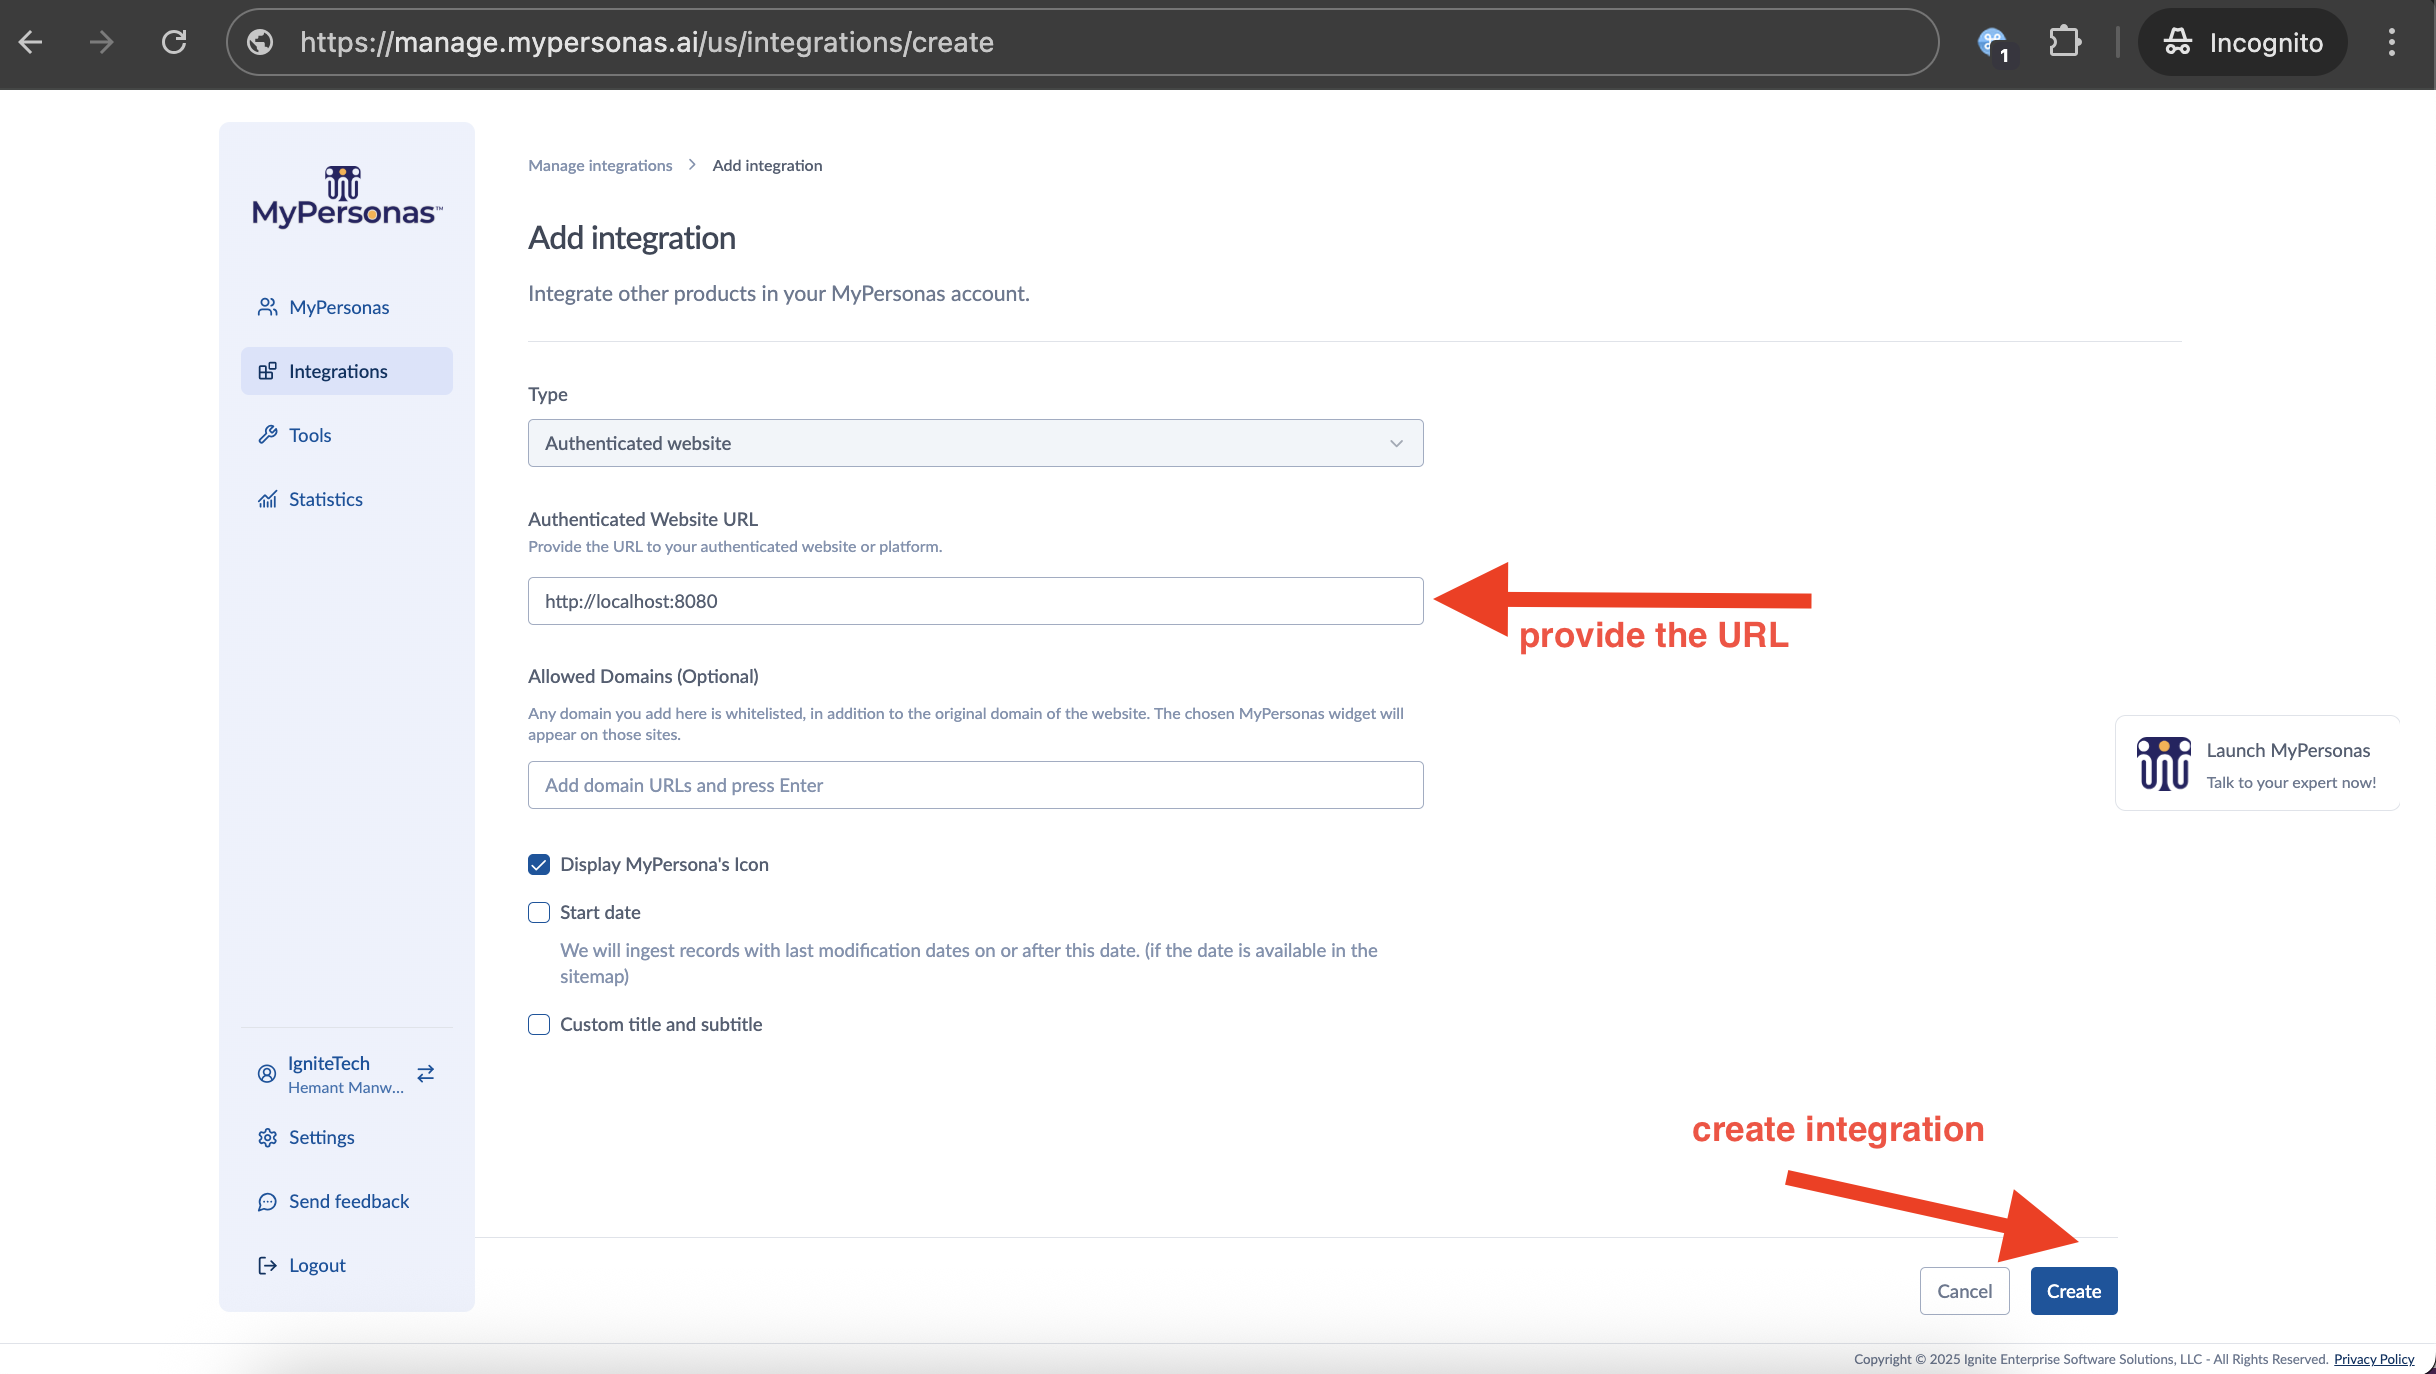
Enter your Authenticated Website URL.
-
Click Create.
-
Once created, the integration will appear in the Integrations List.
Step 3: Copy and Configure the Script
-
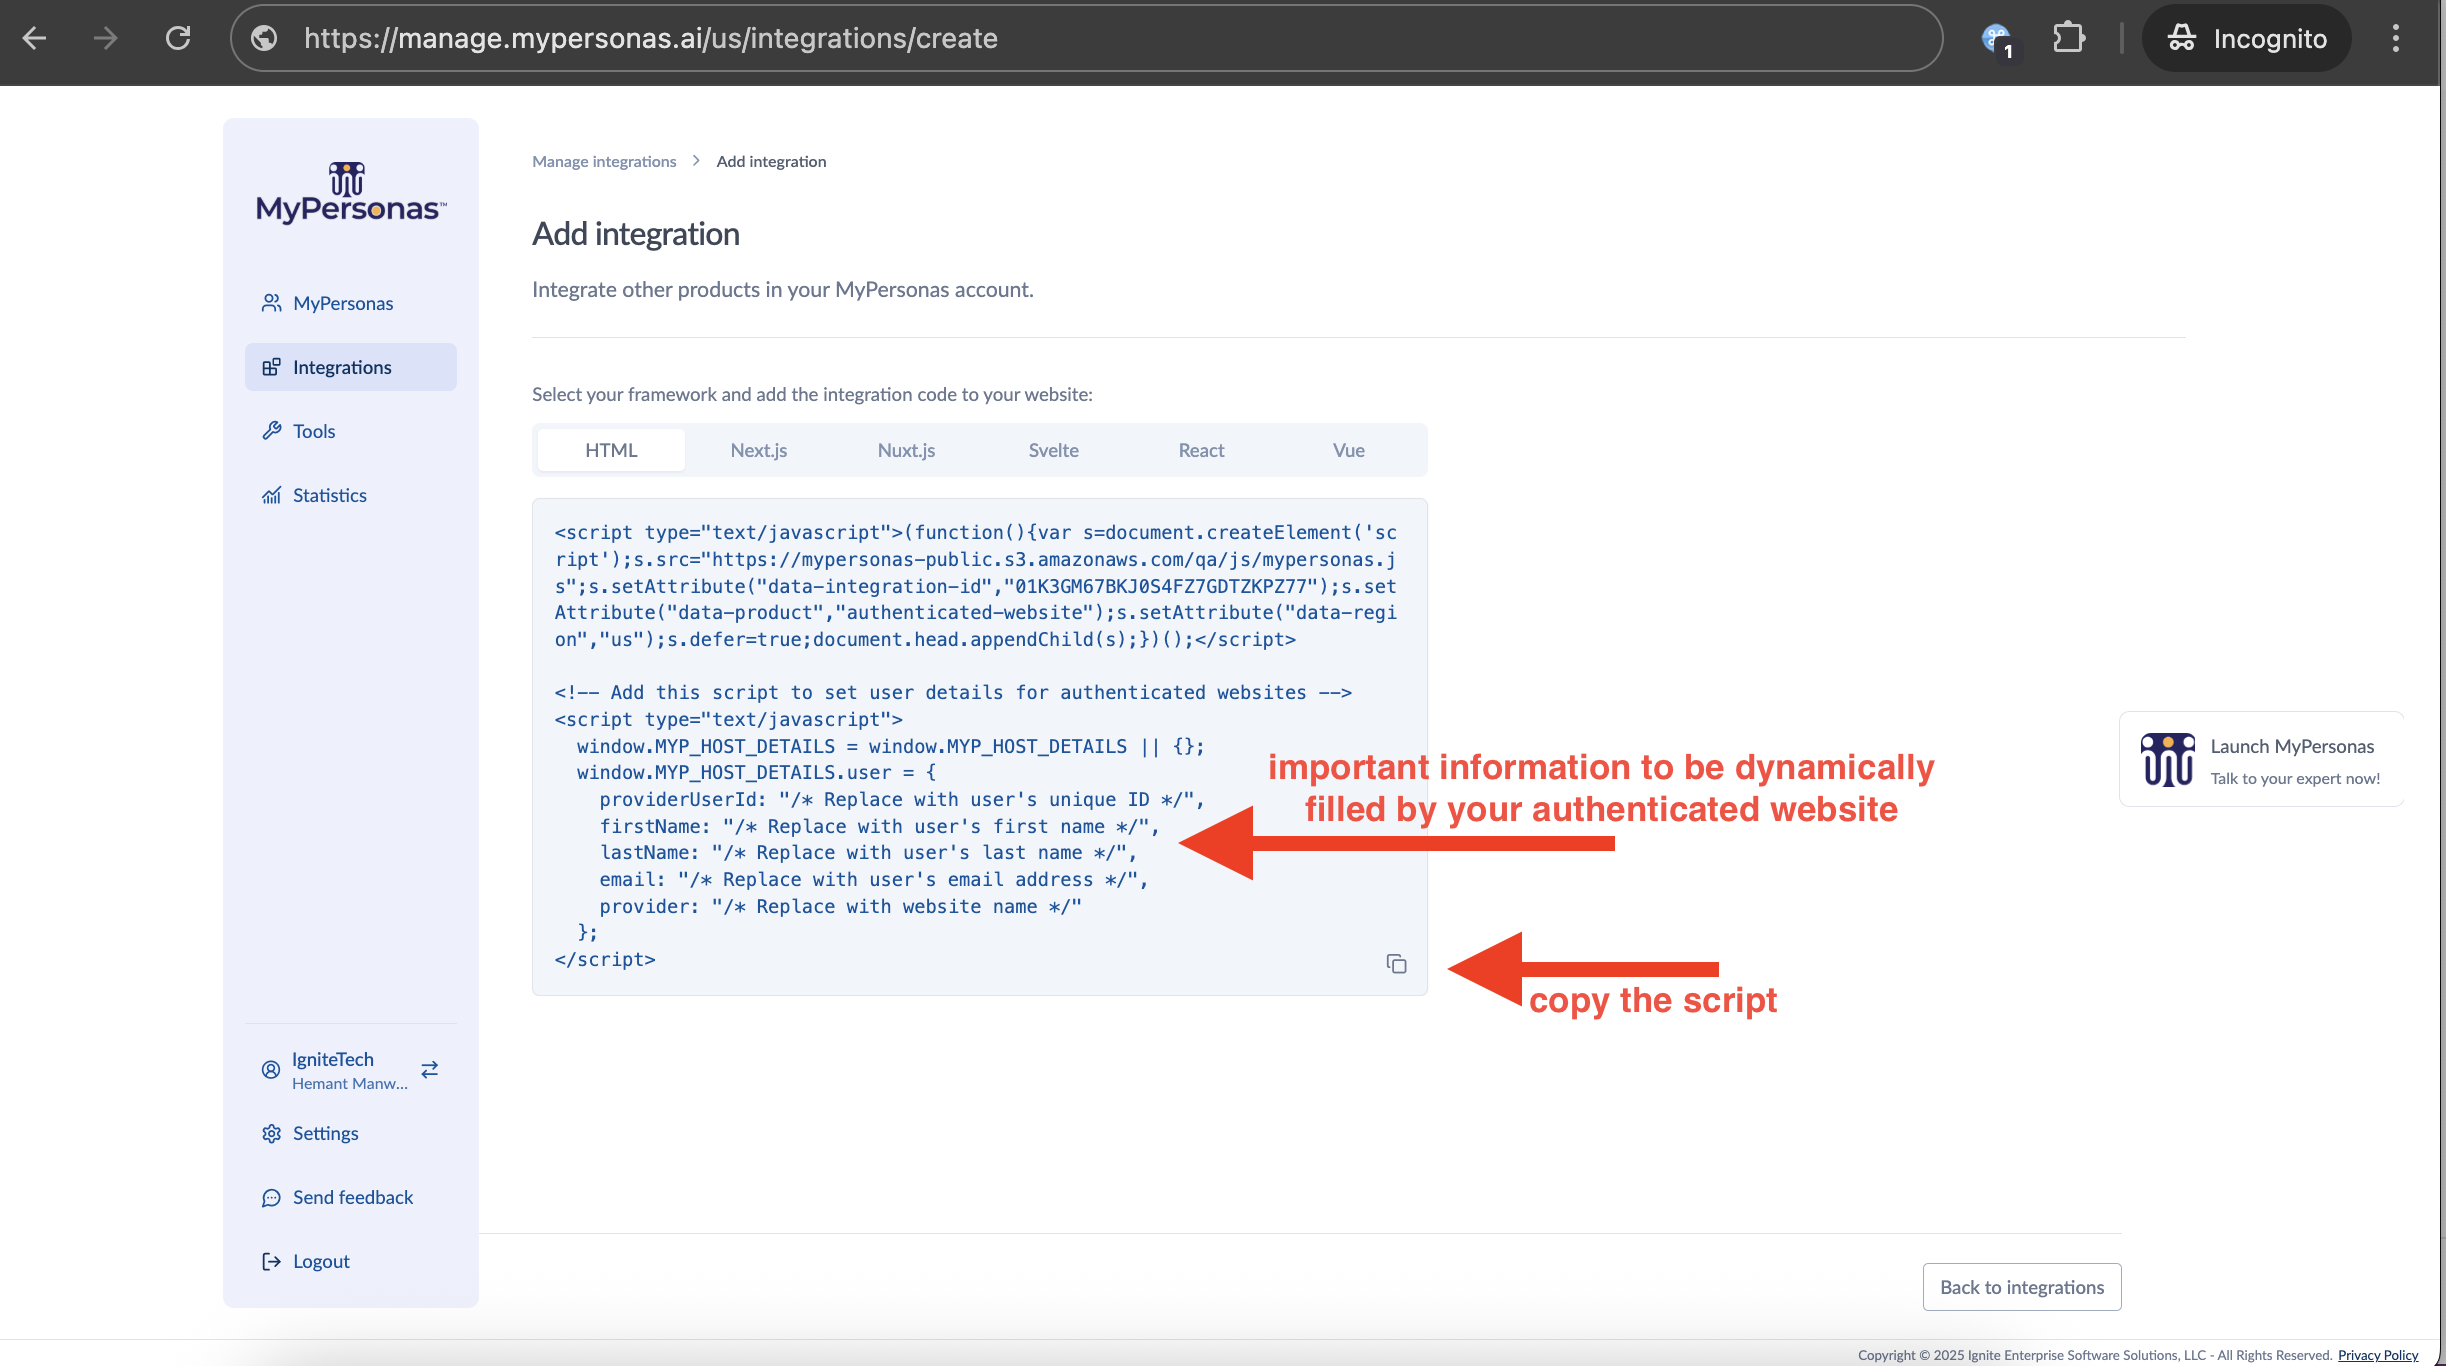
In the integration list, click Show Script.
-
Copy the generated snippet.
-
Paste the script into your website’s header HTML.
For framework-based sites (Next.js, Nuxt, React, Vue, Svelte):
-
Insert the snippet into the appropriate head injection point.
Step 4: Customize User Metadata
The script requires key user details to properly identify users:
-
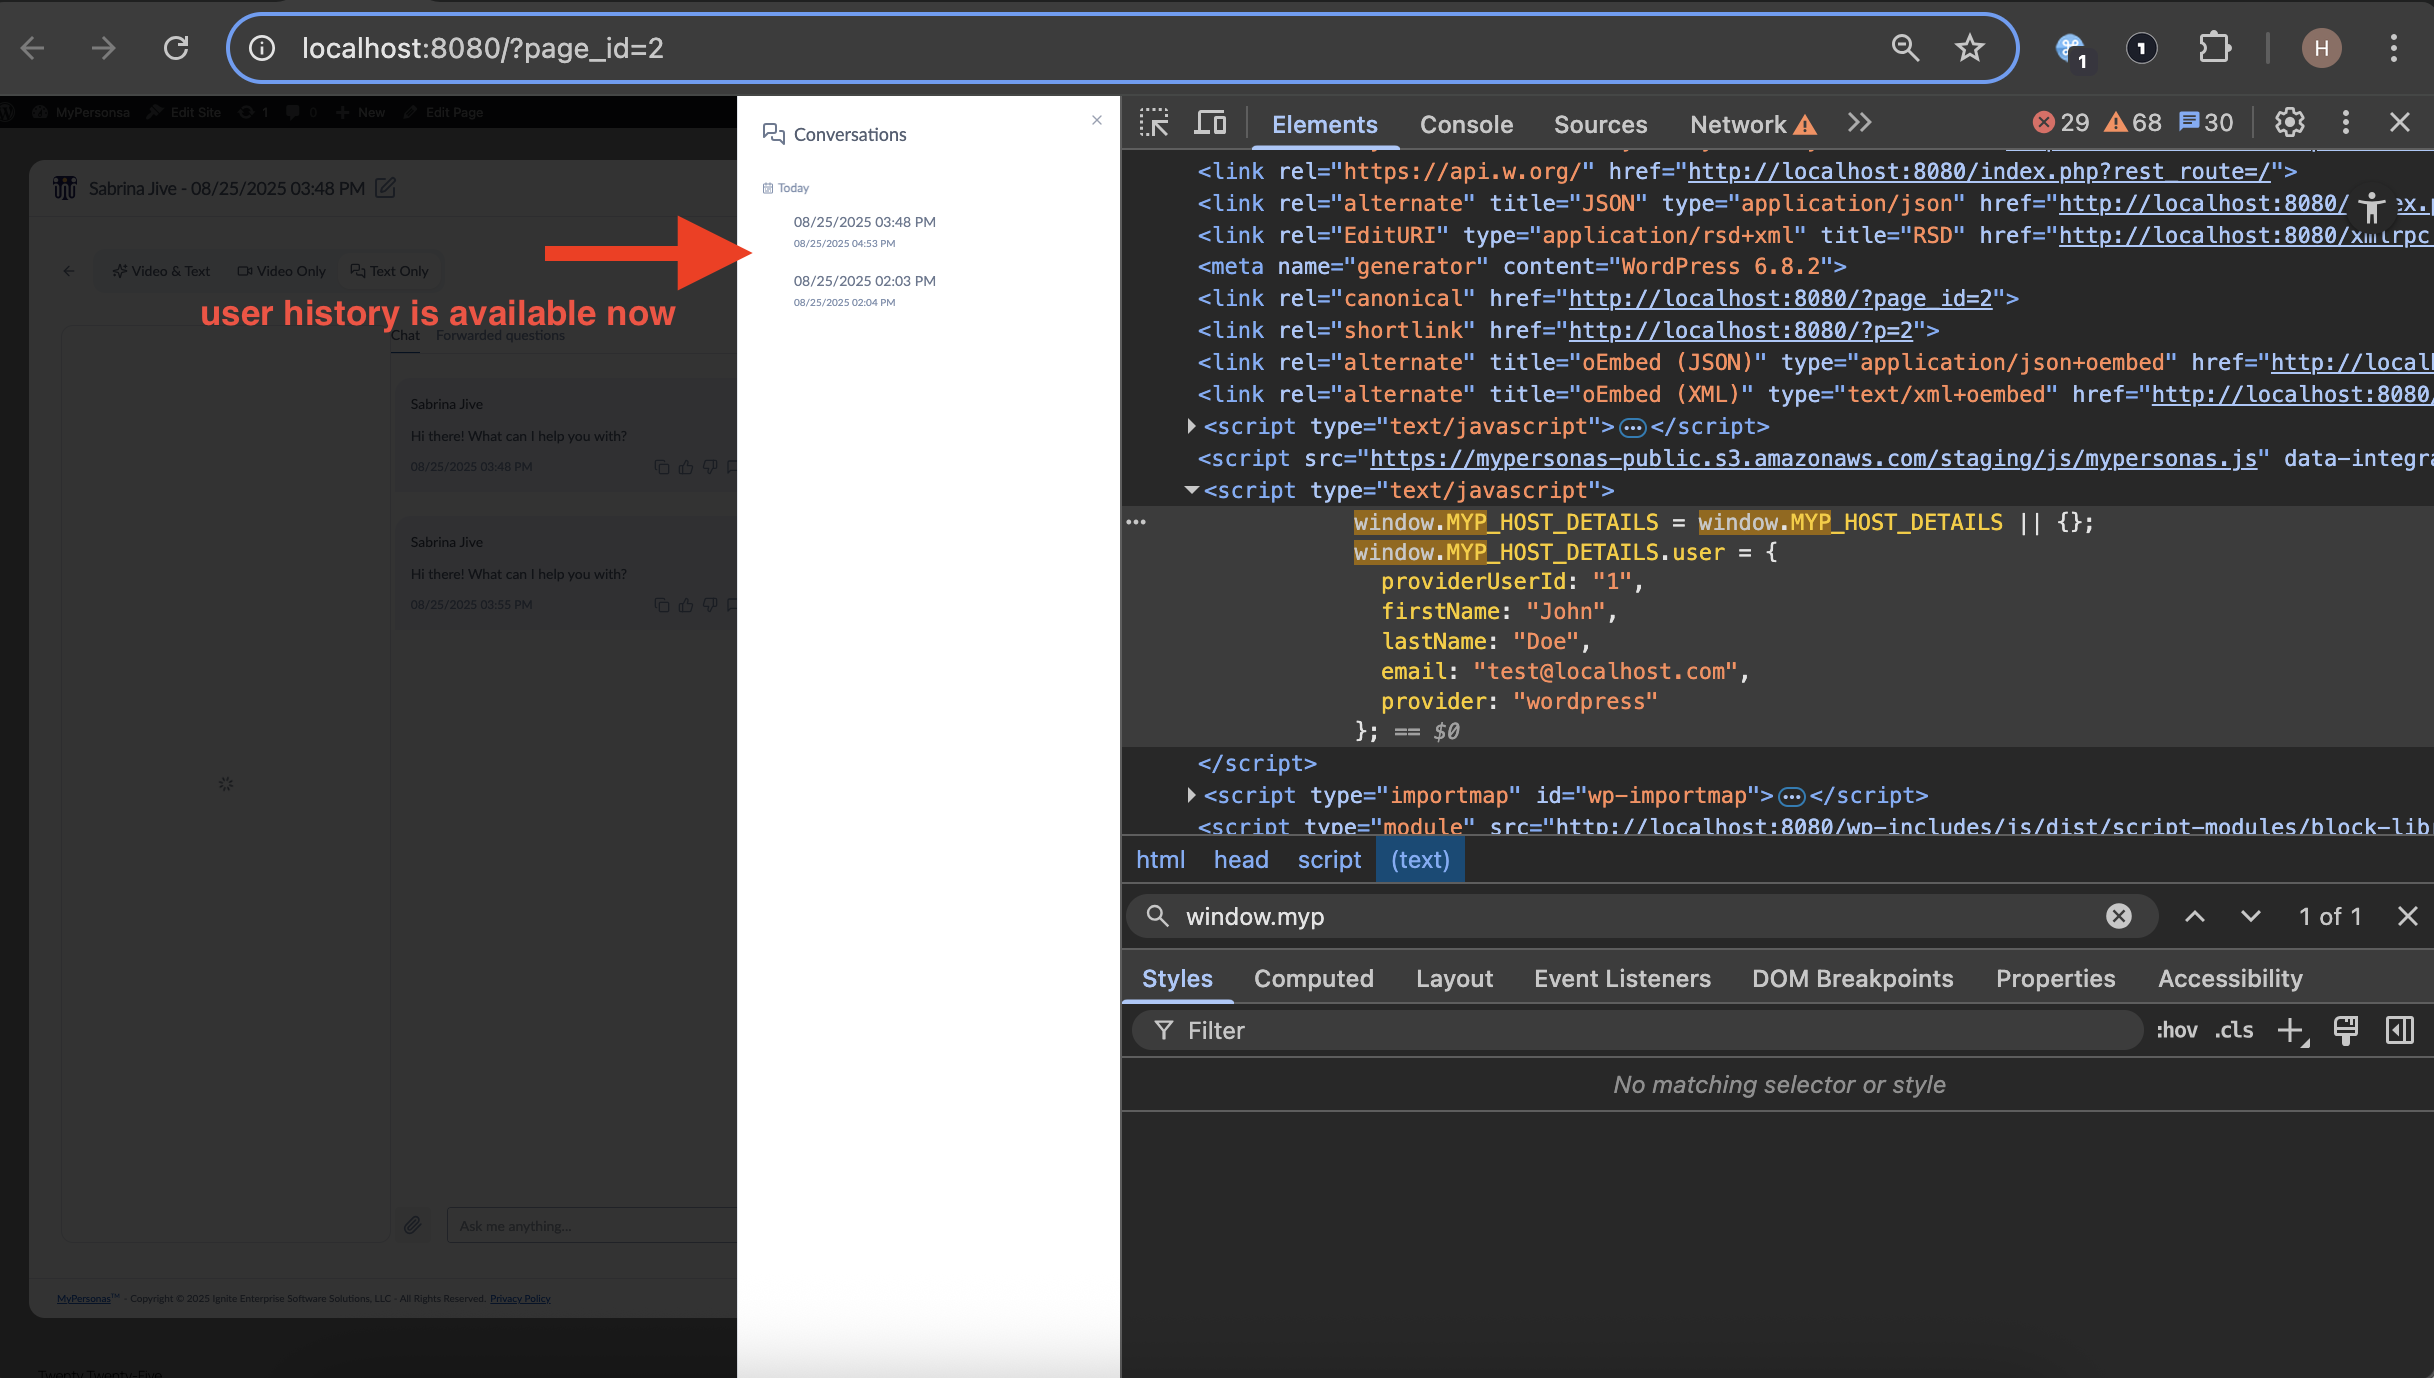
providerUserId – The unique user ID from your system
-
firstName – User’s first name
-
lastName – User’s last name
-
email – User’s email address
-
provider – Identifier of your platform (e.g., "WordPress", "IntranetApp")
In wordpress this could be achieved using a plugin, which is attached here for example.
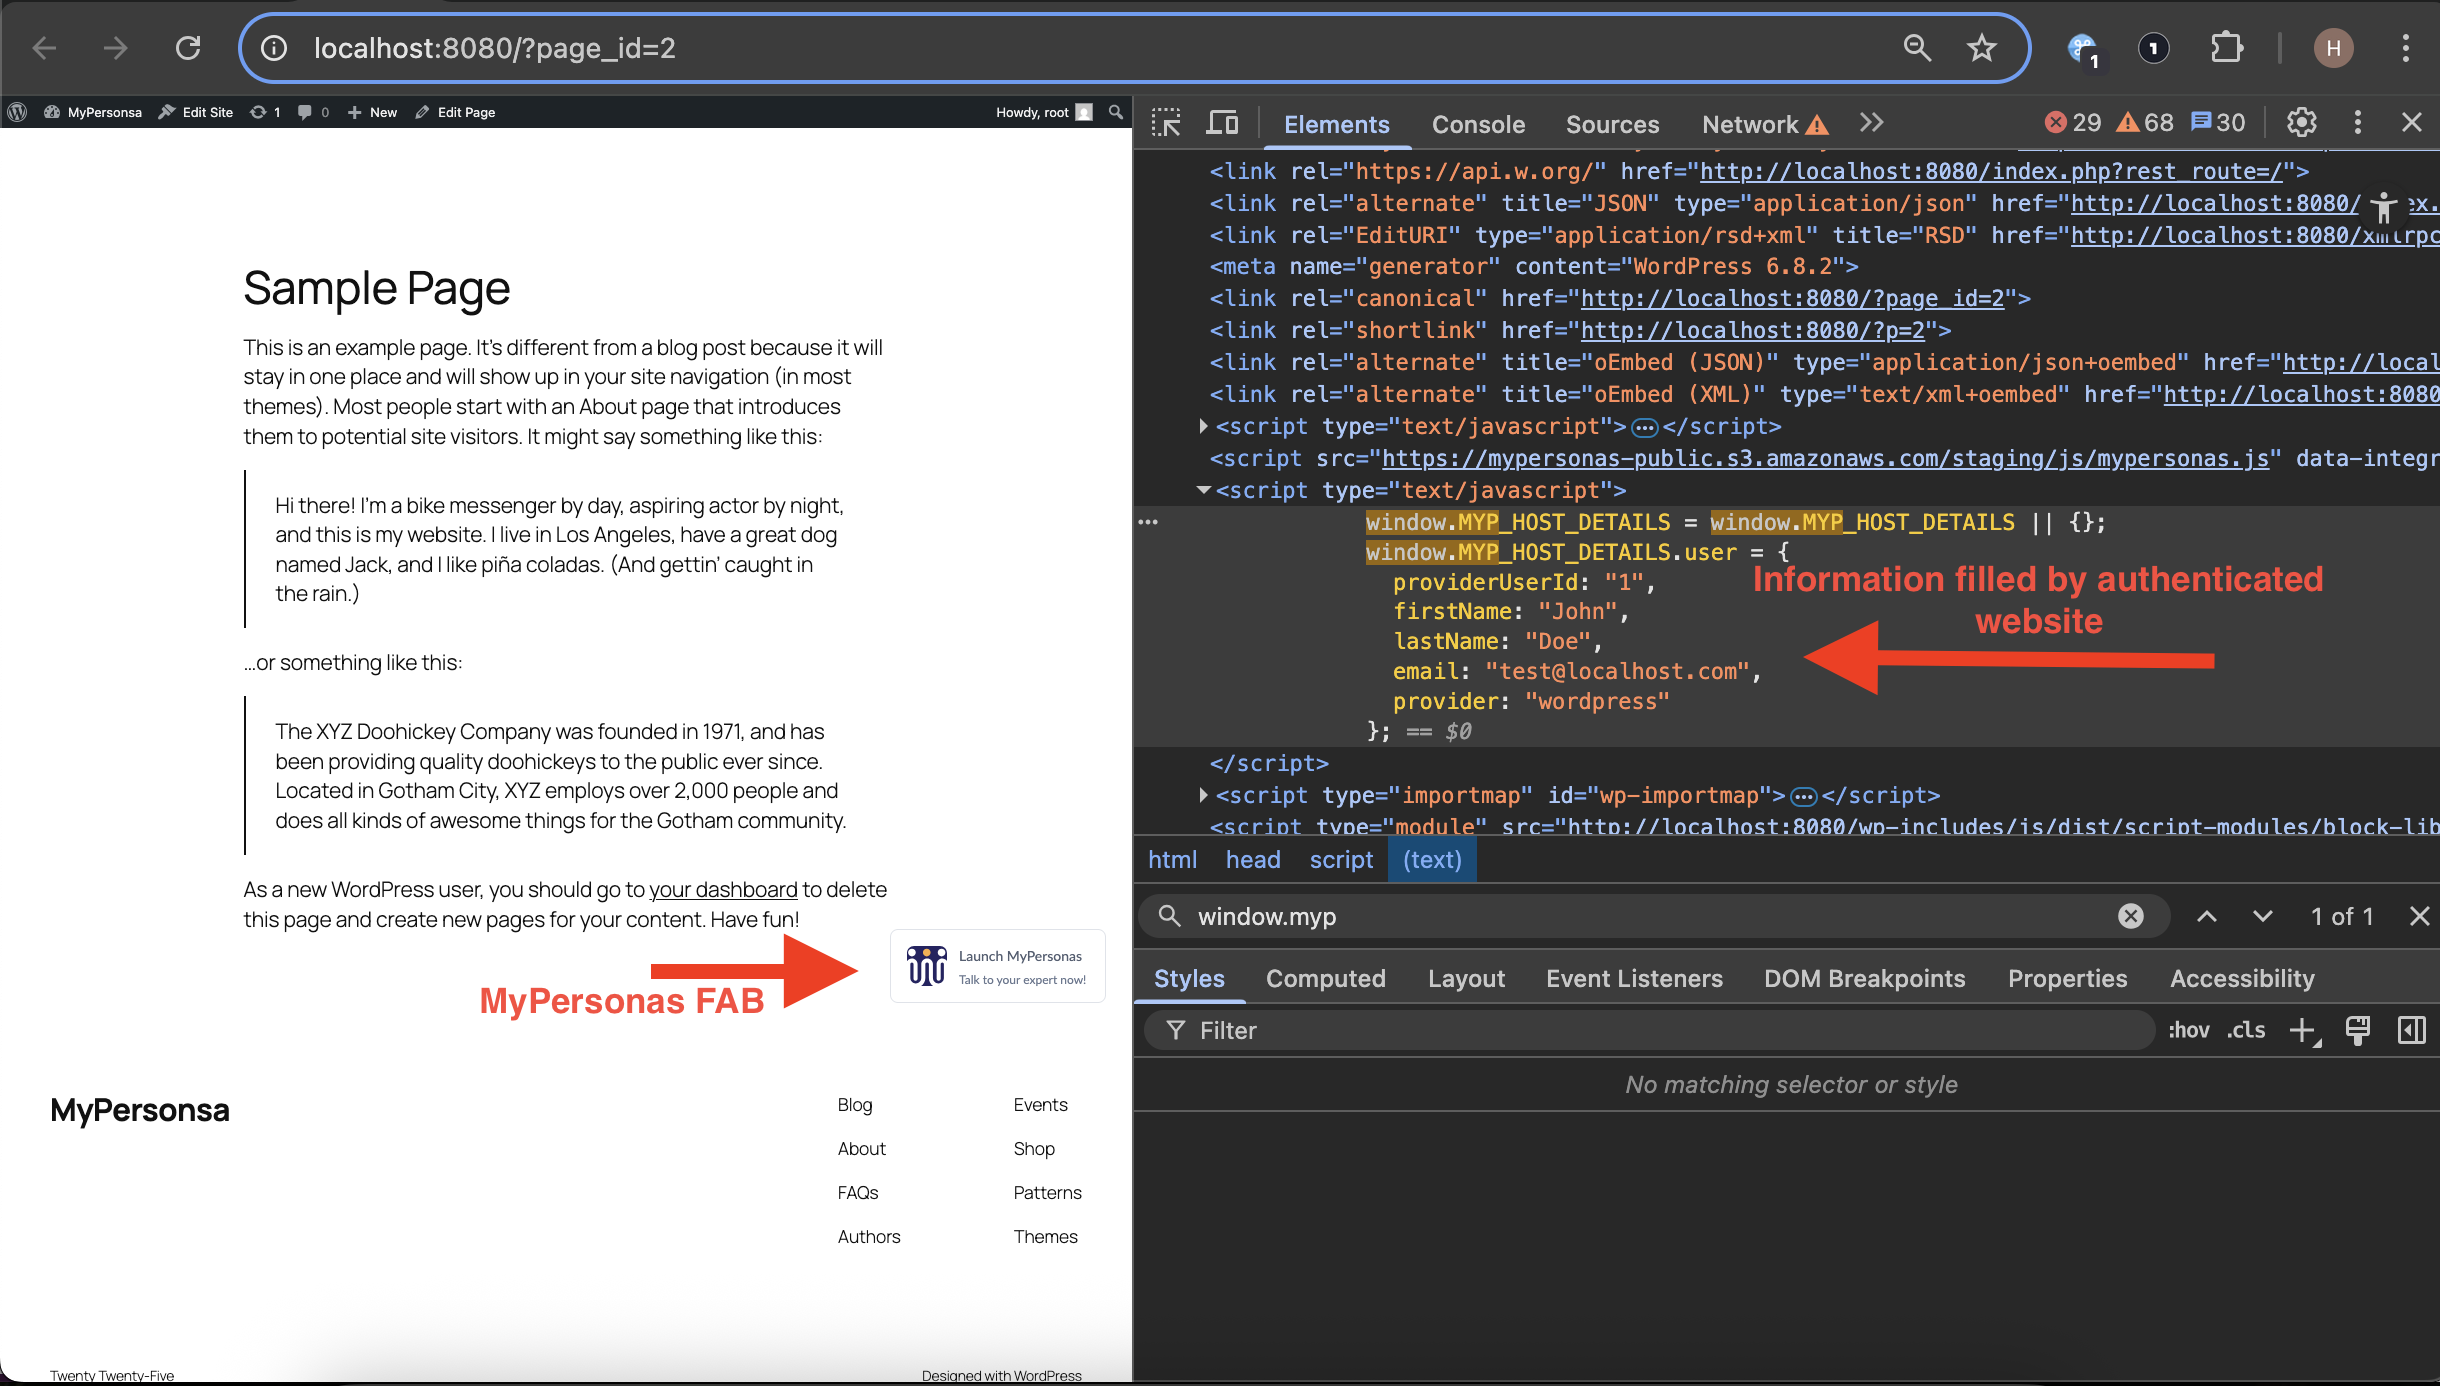
When the script is properly installed, you can check by opening Developer Tools in your browser and searching for window.MYP_HOST_DETAILS. You should see the populated user details.
 Step 5: Verify Integration
-
Refresh your website page.
-
A Floating Action Button (FAB) should now appear in the bottom-right corner.
-
Initially, no MyPersonas will appear. To assign one:
-
Go to MyPersonas in the dashboard.
-
Select a MyPersona → Manage Knowledge → Integrations.
-
Add the authenticated website integration you created.
-
Step 6: Test MyPersona on Your Website
-
Return to your website and refresh.
-
Click the FAB → Your assigned MyPersona will now be available.
-
Start a conversation to confirm the setup.
Step 7: Enable Conversation History
Authenticated integrations allow user-specific session history because the providerUserId links conversations to real users.
-
Users can see their previous chats when returning.
-
This ensures continuity and personalized responses across visits.
Summary
By setting up an authenticated website integration, you:
-
Securely embed MyPersonas into a private website
-
Provide personalized interactions using real user data
-
Enable conversation history for returning users
Once complete, your users will enjoy a seamless experience with your MyPersonas, directly from within your secure platform.
Hemant Manwani
Comments